Wednesday 30 April 2008

Bugs Bunny, Daleks and Carrot Paté

Q. What’s a wok for?
A. To throw at a wabbit when you don’t have a wifle!

Today is that wascally wabbit, Bugs Bunny’s 70th birthday. Like many of us, I spent many hours as a child laughing at Bugs jokes like the one above. So to celebrate I thought it was time to post about the carrot paté I made last weekend. Though I don’t know that Bugs would appreciate his carrots mashed with tofu and baked. Nor do daleks according to E. The paté froze solid in my fridge in the dalek lunchbox. Maybe if you had opened my fridge you might have heard cries of ‘exterminate, exterminate!’ (If you want to see the lunchbox, you can see a photo here.)

But one person who does love a bit of tofu is Ricki. It was her recipe I used for the paté. I have never made a baked paté but thought that hers looked like such a firm and colourful loaf that I have been wanting to try it ever since I saw it. So I was surprised when it came out of the oven and was light and soft like a mousse rather than dense and stodgy as I expected. Once I got over my disorientation with the texture, I really enjoyed it. I used fresh thyme as well as parsley and the herbs gave a pleasing flavour.

It has been delicious on toast for breakfast, lunch and dinner. I had intended to serve it for dinner with salad but the weather has gotten so cold lately I had to serve it with roast veggies and leftover nut roast instead. It is a summery dish so I intend to try it again in warmer weather when I want something light and tasty with a salad.

Carrot and Tofu Pâté
(adapted from Diet Dessert and Dogs)

450g (1lb) carrots
2 tbsp (30ml) olive oil
2 tbsp (30ml) cider vinegar
2 tbsp (30ml) white miso
1 tbsp fresh thyme (or ½ tsp dried)
300-400g firm silken tofu
2 tbsp (30ml) cornflour (cornstarch in the USA)
1/2 cup (120ml) chopped fresh parsley or coriander

Preheat oven to 170 C (325 F). Grease a small loaf tin and line with baking paper. My loaf tin is 13 x 22 cm and the loaf was quite a lot flatter than Ricki's so I think she must have quite a small tin.

Cook carrots in lightly salted water until tender. Drain (Ricki says to cool but I didn’t). Puree carrots in a food processor. Add remaining ingredients and process until completely smooth.

Pour into the prepared loaf tin and bake for 50-60 minutes or until a skewer inserted in the centre comes out clean.

Cool in the tin for at least 4 hours or overnight. Turn out onto a platter to serve. Serve with bread, dry biscuits or rice crackers. Beware the dalek lunchbox for storing leftovers!

On the Stereo:
Donec Ad Metam: Various Artists

Tuesday 29 April 2008

Green Gourmet Giraffe Birthday Cake

A year ago today I started my blog with a Vampire Cake that I made for E’s birthday. This year he shared his birthday cake with my blog and it had to be a Green Gourmet Giraffe Birthday Cake!

I thought it was the right moment to share how I came up with the name of my blog: Green is a favourite colour because it is so cheerful and hopeful. It also signifies green politics that encompass vegetarianism, feminism, environmentalism and social justice movements. Gourmet was inserted into the title because I like alliteration and I wanted it clear that it was a food blog, although I don’t believe much of my cooking is terribly gourmet! I did a school project on the gorgeous, gracefully gangly Giraffe when I was 7 years old and have been fascinated by them ever since. Unfortunately I have lost the booklet I did but I can assure you my pictures were quite amusing. The giraffe is the tallest land-living creature and has a deadly kick and a tongue long enough to clean its face. They are mute, require 1.9 hours sleep on average a day and are quite vulnerable to lightning. Being tall has its drawbacks! They always seem so peaceful and gentle at the zoo, and I am sure would make a lovely pet.

So it seemed fitting - and fun - to make a green giraffe cake to celebrate a year of blogging. I love my novelty cakes. This cake comes from the esteemed Australian Women’s Weekly Children’s Birthday Cake Book. Of course, in the book, the giraffe is yellow with brown spots.

Given that E loves plain vanilla sponge, I love chocolate and my blog is green, I decided that the best compromise would be a marble cake. I used to love this cake when I was little but my mum always made it with vanilla, chocolate and pink. It is really a pretentious butter cake. I found a recipe for choc orange marble cake, increased the quantity and changed it to a choc-lime-vanilla combination. You could also make other cakes such as a gluten free chocolate cake or a plain butter cake, so long as it is a firm cake that keeps its shape. And if you don’t want a green giraffe you can always colour the icing yellow and use brown sprinkles for the spots. My instructions on how to make a giraffe cake are lengthy as I wanted to share some of the problems and tricks.

We took the cake down to Geelong to share it with some of my family. With all the sickly sweet icing, I was only too happy to share it around, and it was nice to see the excitement on my nieces' faces when they saw it. With my mum's scones and my dad in charge of drinks, we had a lovely afternoon tea. A birthday cake wants a candle, and the little gluten free cake I made for my little niece Grace made a perfect candle holder. Happy Birthday E! Happy Birthday Green Gourmet Giraffe!

Green Gourmet Giraffe Birthday Cake
(adapted from the Australian Women’s Weekly Children’s Birthday Cake Book)

- 1 quantity of choc-lime marble cake (see recipe below) or use 1½ the quantity of a butter cake mixture
- about 500g icing sugar (confectioner’s sugar)
- 60g margarine or softened butter
- green food dye (or blue and yellow food dyes)
- shoestring liquorice
- jubes
- 2 smarties
- 2 x thin chocolate covered liquorice sticks or chocolate fingers or musk sticks or plain liquorice sticks or any other long thin edible sticks
- green and blue sprinkles (I used Twinkles)

Ideally cook the cake the day before so it is easier to cut. Two thirds of the cake should be baked in a lamington tin (28 x 18cm or 11 x 7 inch) and the other third in a long thin bar loaf tin (25 x 8cm or 10 x 3 inch). I didn’t have such a thin loaf tin so I just used my usual 20 x 13 cm and trimmed it.

When the cake has cooled, place it on a large board. The AWW suggests 45 x 40cm (18 x 16 inch). I used a large baking tray. Cover with plastic cling wrap if leaving overnight. Use a small sharp knife (preferably serrated) to cut the cake.

Cut a head shape out of the large flat rectangular cake. It should be quite thin so you might need to trim the sides a little. Cut the ears out of the trimmings – they should be about one third of the length of the face and have horizontal bottoms so they sit out at the side of the head a little. If I was to change my giraffe I would do the ears a bit bigger and a bit less central on top of the head.

Cut a thin layer from the top of the loaf and place on the middle of the head to shape the nose a bit. If your loaf tin is thicker like mine trim one of the long sides so it is about 8cm (3 inches) horizontally. Cut a horizontal line across the top so it will sit against the head at an angle to make the neck.

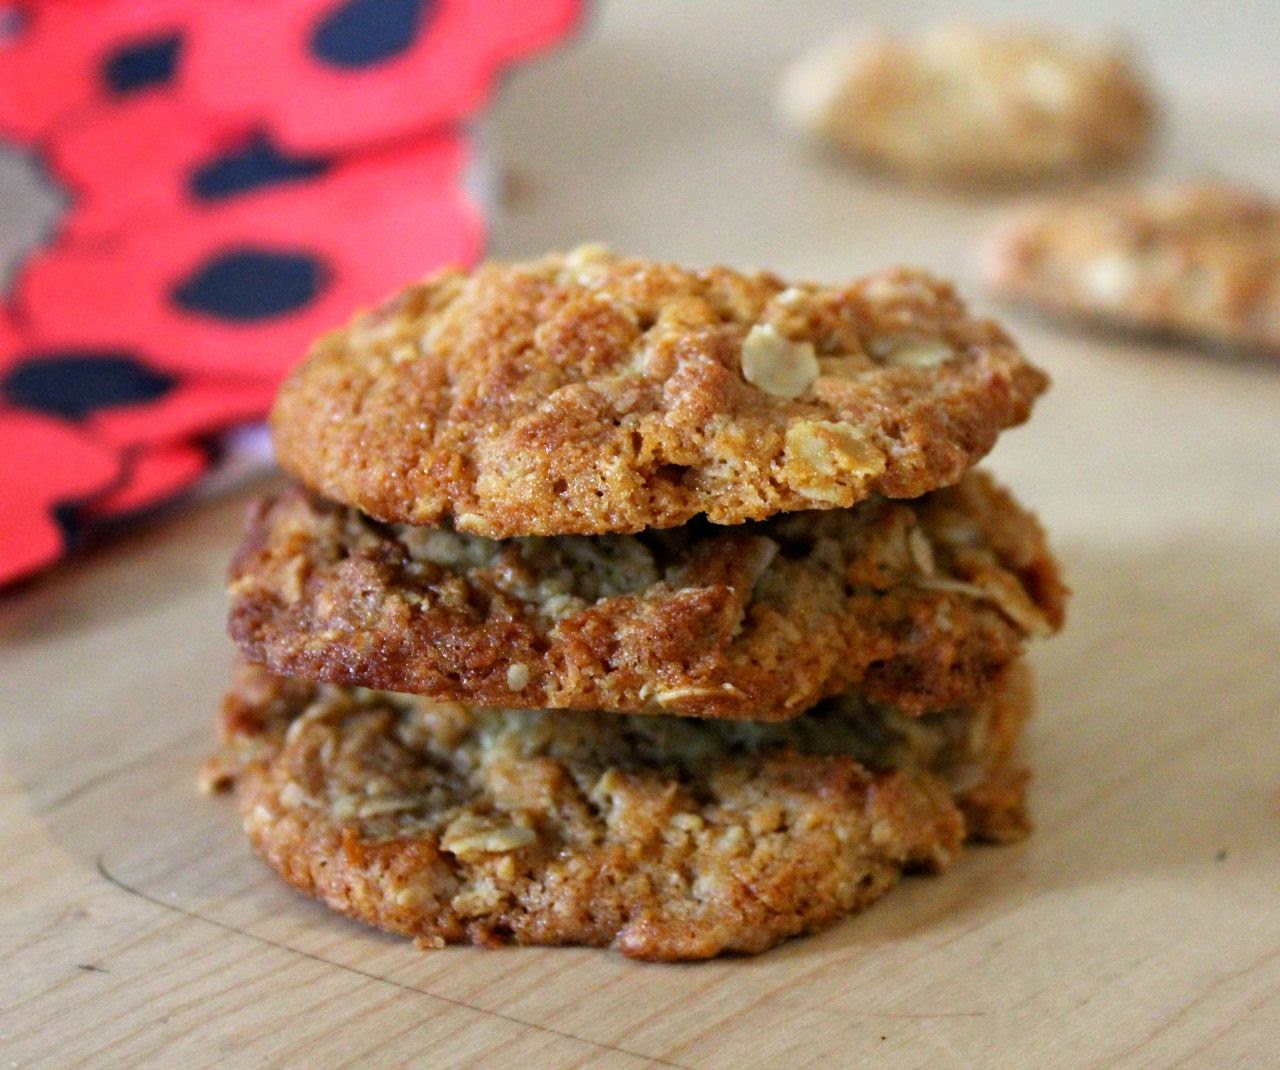
Remove the trimmings and assemble the cake to look like an uniced giraffe, as in my photo. You will have quite a lot of cake leftover so you might want to make trifle or these cookies or just have a mountain of iced bits of leftover cake.

Make the icing (or frosting) by mixing icing sugar with the margarine and enough boiling water to make a smooth paste. I have given very approximate quantities here, so use your judgement on how much you need. Add some food colouring to make it green, either with green dye or a mixture of blue and yellow. Spread icing evenly over the cake with a butter knife. This is the most time consuming part of the preparation and requires patience to go around the nooks and crannies and do all the sides.

Icing the ears was the hardest. First I put some blobs of icing on and then use a knife dipped in a mug of hot water to spread it evenly without bits of cake showing. For the rest of the cake I first spread the icing on and then when it covered the whole giraffe, I used a knife dipped in a cup of hot water to smooth it.

Once the icing is smoothly covering the giraffe, it is time to give her some personality. I cut some white bits off a strawberries and cream jube and then cut the eyeball out of a coloured jube and used a tiny bit of icing to attach the eyeball to the white and put them on the cake where the eyes would be. I cut some liquorice strip and used it to go around each eye. I place the smarties at the bottom to be the nostrils.

I mixed two thirds green and a third blue sprinkles in a small bowl. I used a teaspoon to drop small piles of sprinkles and smoothed them out into round patches. I found it hard to do this without a few bits of sprinkles scattering outside the circle. Finally I spread a little icing over the chocolate liquorice logs and rolled them in the sprinkles. I made sure there was a little icing on the end to meet the head and also on the bottom so the ‘horns’ would stick to the head and to the board. In the AWW, it suggested wrapping thin liquorice strips tightly around a lollypop stick - or ice cream stick? - and placing a jube at the top.

NB if you don’t want to spoil the appearance of the giraffe with candles, you can have one or a few little cakes on the side to put candles in. Just spread cake(s) with green icing and decorate with some sprinkles or lollies (sweeties, candies) so it looks celebratory.

Choc-Lime Marble Cake
(adapted from the Australian Women’s Weekly Cakes and Slices Cookbook)
Enough to make 2 x round 20cm cakes or 2 x loaves

60g dark chocolate (I used a large dessertspoon of cocoa)
185g butter, softened
2 tsp vanilla essence
1½ cups sugar
3 eggs
3 cups self raising flour
1 1/8 cup milk
1 tbsp lime zest
Green food dye

Grease and line a lamington tin and a thin loaf tin (see instructions above). Preheat oven to 180 C. If using melted chocolate, melt it now so it cools while you prepare the batter.

Cream butter, vanilla essence and sugar. Add eggs, beating after each addition. (If you are catering for any gluten free diets, you can take out a few spoons of the mixture at this point and add a little gluten free flour, baking powder and milk then bake in a ramekin or muffin tin.) Add flour and milk and stir to combine.

Divide the mixture evenly among three bowls. Stir the melted chocolate or cocoa into one bowl, the lime zest and a few drops of green food dye into the second and leave the third bowl plain. Drop blobs of cake batter into the pans trying to evenly distribute the colours. Then take a knife and swirl the colours around once or twice to create a marbled effect.

Bake cakes in moderate oven for about 30 minutes or til a skewer comes out cleanly. Cool on a wire rack. The recipe suggested a fudge chocolate frosting but I chose a plain icing for the giraffe cake (see above).

On the stereo:
Café Concerto: Pulp

Sunday 27 April 2008

Toothpicks, Tacos, and Oaxaca

It was E’s birthday early last week and the book I ordered is still en route, the ideal birthday card was sold out, and one of the shops I went to buy presents had closed down. So it came as no surprise that the dinner I made him this year felt a bit like a dress rehearsal - tacos without salsa and a pudding that needs a bit of work! But I did learn about toothpicks, tacos and Oaxaca.

He asked for a Mexican meal so we agreed on Oaxaca tacos from the Café Flora Cookbook. They looked a little different to the chilli non carnes that I usually make for tacos and apparently are popular at Café Flora. This meal requires quite a bit of preparation and felt fitting for a special celebration.

My first challenge was toothpicks. It was helpfully listed with the ingredients and I was sure I had them. But as I began preparing dinner I searched the kitchen with no luck. Finally I found a packet of little Australian flags on toothpicks that I had bought years ago for a party and never used. It felt a little unpatriotic tearing the flags off but I realised that the toothpicks were crucial to the dish. Whenever I have had tacos previously, I have bought a box of crisp taco shells. These were tortillas dipped in hot oil and held together by toothpicks. They crisp in the oven so that when the toothpicks are removed after baking the tortillas hold their shape. Next time I will be more careful in checking I have toothpicks!

The tacos were heavenly with the soft cheesy potato encased in the crisp tortilla – worth every drop of oil they were fried in! The bean stew was incredibly tasty. E loves fresh coriander (cilantro) and has chided me before for leaving it out. So, for his birthday, I reluctantly bought a bunch and was pleasantly surprised at how it the flavours of the stew. The silverbeet (swiss chard) was fantastic with the lemon garlic vinaigrette.

But as we sat down to dinner, I said to E how strange to have a Mexican meal with no tomato. It was only later that night when I glanced at the recipe again that I realised my oversight. I had merely followed the featured recipes and neglected to read the full list of components. Hence I had missed the tomato salsa and a lime yoghurt sauce which were detailed elsewhere in the book. Fortunately we had enough for two nights and so on the second night I made these sauces. They did improve the meal, but my new-found appreciation for fresh coriander waned again as I tasted it raw in the salsa.

I was curious about why they were called Oaxaca tacos. I had thought it was a variety of squash which was obviously wrong as there was not a squash to be seen in the meal. Wikipedia put me right. Oaxaca is a city and a state in the south of Mexico. It is notable for containing more speakers of Indigenous languages than anywhere else in the country. An abundance of fruit and vegetables grow in the central valley, and Oaxaca is knows for its black beans, corn and chocolate are common foods.

So my tacos were a little less than authentic with the change from black bean stew to kidney beans. My salsa was a little less than fiery. The name of the salsa, Pico de Gallo, translates as the beak of the rooster, and is so called because originally it was eaten by using the thumb and forefinger. I was a bit lacksadaisical with the measurements and tried to reproduce which I did below because it tasted fantastic. If they eat like this in Oaxaca, then I think it is a place I would love to visit.

Dhivya at A Culinary Bazaar has started a new event called A Worldly Epicurean's Delight (AWED). The theme for the first month is Mexican Food, so I am sending this her way.

Oaxaca Tacos with Kidney Bean Stew and Tangy Silverbeet
(Adapted from the Café Flora Cookbook)
Serves 4

1½ lb russet potatoes, peeled and quartered (I used chat potatoes)
2 tbsp unsalted butter
½ tsp salt
½ cup (2oz) grated mozzeralla
½ cup (2oz) grated smoked cheddar cheese
Big pinch red chilli flakes
Vegetable oil for preparing tortillas
8 thin corn tortillas
1 small green or red capsicum, finely chopped
Toothpicks
Black bean stew – recipe below
Tangy silverbeet (swiss chard) – recipe below
Pico de Gallo Salsa – recipe below
½ cup yoghurt
Zest and juice of 1 limes

Prior to starting tacos, it is best to have made bean stew, lemon garlic vinaigrette and salsa. The stew and vinaigrette can be done the previous day (as can the mashed potatoes).

Preheat oven to 200 C. Cook potatoes for 20-40 minutes til tender. Mash with butter and salt. Combine cheeses and chilli flakes.

Heat about ½ cm of oil in a frypan. Place first tortilla in hot oil for 8-10 seconds. Turn and leave for another 8-10 second. The tortilla should be coated in oil but not crisp. Repeat with other tortillas and keep warm (Recipe said to cover with foil - I just piled them on a piece of kitchen towel and they kept warm enough).

Place a tortilla on a flat surface. Place a third of a cup of mashed potato along the middle strip. Sprinkle mashed potato with 1 tbsp of capsicum and 2 tbsp of cheese mixture. Bring edges of tortilla up to overlap across the filling. Use 1 or 2 toothpicks to secure (like you would use a pin in dressmaking). Repeat with remaining tortillas.

Place filled tortillas in a roasting dish and bake for 15-20 minutes til cheese is melting and tortilla is crisping up.

While tortillas are baking, mix yoghurt, lime juice and lime zest together. Heat bean stew. Cook silverbeet and toss in vinaigrette.

Divide bean stew and tangy silverbeet among 4 dinner plates. Remove the toothpicks from the tacos and arrange two tacos on each plate. Top with salsa and lime yoghurt mixture.

Kidney Bean Stew
(Adapted from the Café Flora Cookbook)

400g tin of kidney beans (or cook 1 cup of dried kidney beans)
1 cup water
Kernels of 2 ears of corn (or 1 cup frozen corn)
2 cloves garlic, crushed
¼ cup fresh coriander, finely chopped
½ tsp chilli paste
½ tsp ground cumin
½ tsp dried oregano
½ tsp salt
½ tbsp brown sugar (optional)

Place all ingredients in a smallish saucepan. Bring to the boil and simmer for 15 minutes. The recipe suggests adding more water or vegetable stock for a soupier consistency but I like mine quite thick.

Tangy Silverbeet
(Adapted from the Café Flora Cookbook)

1 big bunch silverbeet (swiss chard)
5 cloves garlic, crushed
Juice of 1 lemon
Pinch salt
Good grinding of black pepper
2-4 tbsp olive oil

To make the lemon garlic vinaigrette, mix ingredients except the silverbeet - either in blender or whisk together. (I just used a whisk). Set aside.

Wash silverbeet and dry as much as possible by shaking water off or patting with kitchen towel. Remove and discard stems of silverbeet and roughly chop. Either steam silverbeet til just tender (about 5 minutes) or gently fry silverbeet in a lightly oiled frypan (I used the frypan I had been oiling the tortillas in). When silverbeet is wilted, add vinaigrette and toss to coat. Serve hot.

Pico de Gallo Salsa
(Adapted from the Café Flora Cookbook)

4 tomatoes, cored and chopped
¼ red onion, finely chopped
1 jalapeno chili, deseeded and finely chopped
1 tbsp finely chopped fresh coriander
Juice of 1 lime
2 cloves garlic, crushed
¼ tsp salt

Combine all ingredients in a small bowl.

On the stereo:
Scotch Mist: Various Artists

Saturday 26 April 2008

Historic Cookbooks and Retro Gratin

Before I started blogging, I had never thought to turn to historic cookbooks for recipes and insights. It is not that they wouldn’t have fascinated me, but that as a vegetarian, I had thought that old-fashioned recipes were boring and full of meat and overcooked vegetables. I saw other bloggers with an interest in old cookbooks and sadly thought they were full of the sort of recipes I would never be interested in cooking.

But gradually my interest has been piqued. I started looking at the history of various fruit and vegetables. Then the Neb at Nut Roast event made me curious about the history of the nut roast. I started finding that vegetarian cookbooks were being written much earlier than I had expected. As a former student of history, I can’t get enough of this.

So I was pleased to see that for this month’s Weekend Cookbook Challenge, founded by Sara from i like to cook) is Vintage Cookbooks. Carla of Chocolate Moosey has asked us to cook something from a cookbook published before 1980. Well, I have started to purchase a few vegetarian cookbooks from the 1960s so that didn’t seem too arduous. These give some lovely insights into how much has changed over the past 4 or 5 decades.

One of my recent purchases is Vegetarian Gourmet Cookbook by Joye McKinnell (1967). Many of her recipes are ones I am eager to try, although I will probably give the cheese curry a miss. But I was reminded that she is from a different time when I read her suggestion that each guest should be provided with cigarettes, matches and an ashtray at dinner parties. Likewise I was fascinated by her comment that ‘people often ask vegetarians hoe they can make suet pastry, which is normally made with an animal based fat.’ Gladly, I can report I have never been asked that curly question.

I went further and started looking into Australia’s cookbook history and have managed to purchase a couple of what seem to be cooking standards. The Green and Gold cookbook (9th edition) and Australian Cookery of Today Illustrated. Frustratingly neither have a date but it seems they are 1930s/40s and 1950s respectively. The advertisement on the right is for Gelatine which claims 'Davis' Calves Feet Jelly is a happy thought for a sick friend'. I don't imagine jelly would be advertised that way these days, not would we fancy fruit salad in jelly which is the illustration. Although I would not be surprised if some bright young chef out there is about to resurrect this retro dish!

As I continued my searches through the internet, I began finding online cookbooks and further insights. The best source of these seemed to be The Food Timeline. It not only has links to online collections but also gives advice on interpreting and adapting historic recipes. It was through this site that I found Pure Food Recipes produced by N. K. Fairbank Co in 1910. I was amazed by this quote which appalled me with its suggestion that I should only need two meals a day. (I don’t think so!):

Meats carefully cooked are, no doubt, more easily digested than some vegetables but, on the other hand, vegetables are clean and wholesome. Vegetable foods are concentrated and slow in digestion; hence the vegetarian eats but two meals a day, and of those two meals, if his diet is well selected, he receives more nourishment than the meat eater from his three meals a day’ p 43

And these choice words from an advert for nut oil in Dr Allison’s Cookery Book. Written in 1915, they still ring true today:

"Salads are not used sufficiently by English people, for very few know the value of them. All may use these foods with benefit, and two dinners each week of them with wholemeal bread will prevent many a serious illness.”

These above books interest me as being full of interesting recipes. But then there are online cookbooks like The Closet of Sir Kenelm Digby Knight from 1669 which is a curiosity but I can’t see myself making posset, gruel or bragot. Many of the ‘receipts’ are full of meat. Maybe I could consider trying The Excellent Marrow-Spinage-Pasties. But I think the instructions for the ‘puff-past’ might be beyond me – ‘Take a Gill of cold-water; two whites of Eggs, and one yolk; to a quart of Flower one pound of Butter; so rowl it up, but keep out of the Flower so much as will rowl it up.’

Leaving behind the seventeenth century, I chose to seek a recipe in the International Vegetarian Cookbook by Sonya Richmond from 1965. I had to purchase it because of the wonderful green retro cover. On the back cover we learn that Sonya is a hip young thing living in a spacious flat in Finchley (London) surrounded by tape recorders (to learn Italian) and gramophone records. She loves cheese, Chinese foods and dry martinis. Indeed many of her recipes, no matter which country they hail from, are full of cheese, cream and eggs. This made it hard for me to choose a recipe.

Indeed, I did wonder, what is the point of cooking from historic cookbooks? Is it so we can be astonished at how different our ancestors’ food was or so we can get a feel for the way they lived or so we can find their recipes really aren’t so different to ours? I guess it is creating connections with our past. I chose a recipe which both fascinated me for its retro weirdness but which might attract my attention in any cookbook as something strange but interesting.

'Bananas and Spinach au Gratin' is apparently a French dish but I am doubtful that many in France would have tasted it now or in the past. But it wasn’t just the strange combination that took me out of my comfort zone. The way the recipe was written made me realize just how much I am spoonfed by our modern recipes.

The lack of times, oven temperatures and some measurements meant that I had to think about what I was doing more than I usually might. How big a dish? How much butter? How long to bake? When E asked how long to dinner I couldn’t just look at the timing in the recipes to help me give an estimated time of eating. But the lack of direction also reminded me that often I don’t really adhere strictly to measurements but use a bit of judgment and taste in grabbing a handful of breadcrumbs or a knob of butter.

Two things I really dislike doing are washing a large bunch of spinach and pushing food through sieve. But in the spirit of the recipe I bought fresh spinach which needed a thorough rinsing and, when it was tender I began to push it through a sieve. I might as well have been pushing a camel through the eye of a needle and finally resorted to finely chopping it with a large knife. It produced the same spinach mulch which reminds me of cut grass. But mostly I followed the recipe. Another dilemma was what to serve with it. I ended up tossing some boiled vegies with butter and parsley which seemed appropriately retro.

The resulting dinner was strangely pleasing. I quite liked the banana coated in crispy cheesy breadcrumbs accompanied by the creamy spinach. E gave a thumbs down and barely ate any of the gratin. In reflecting on it I thought maybe the chunks of banana were too confronting. He has agreed he would try it again if I halved and mashed the banana. So there might be a next time but I would be less generous with the butter. This is a dish of the Swinging Sixties that I suspect very few hipsters could boast of eating. Those who did no doubt felt as adventurous as I did last night.

Banana and Spinach au Gratin
(from International Vegetarian Cookery)
Serve 2 as a main or 4 as a side

1lb (450g) fresh spinach
2 bananas
1 grated cheese
Breadcrumbs
2 tbsp chopped parsley
1 tbsp thick cream (I used yoghurt)
Butter as required (I used about 80-100g)
Salt and black pepper

Wash spinach and drain well. Sauté briefly in a little melted butter in a large saucepan. Cover and cook on low heat til tender and a lovely green. Puree either by pushing through a sieve or using a food processor or finely chopping with a knife. Stir in the cream and a tablespoon of butter. Spread evenly in a buttered casserole dish (mine was about 23cm in diameter, but smaller would be fine).

Peel and roughly chop the bananas and lightly fry in some butter till starting to soften. At this point I would mash them even though this is not in the recipe. Evenly distribute bananas over spinach.

Sprinkle with breadcrumbs (a couple of small handfuls), grated cheese and parsley. Bake in a hot oven (230 C) for about 20-30 minutes until topping is crisp and golden brown. Serve with steamed and buttered vegetables for the full retro feel!

On the Stereo:
Ultra Lounge: Various Artists

Friday 25 April 2008

ANZAC Day and the Biscuit Police

Today is ANZAC Day in Australia and New Zealand. It celebrates the day that the Australia and New Zealand Army Corps (ANZAC) landed at Gallipoli in Turkey, their first taste of active service during World War I. It was a disastrous mission that was marked by the Aussie determination despite a futile battle. They landed at the wrong place and had no chance. The Turks had the upper hand as they shot at the ANZACS from the cliff tops. The most successful part of the battle was a retreat with minimal casualties. This was seen as our baptism of fire, the birth of the nation, the first real test for the Australian nation after Federation in 1901.

So what does it mean to me? As a primary school kid, each ANZAC day would see us assembled in the school hall to hear old returned soldiers tell us about their experiences. We would read the story of Simpson and his Donkey and bake ANZAC biscuits. Every year there would be an ANZAC Day parade which I don’t remember going to, but my mum tells of going with her parents and her dad’s mates yelling out at him to join in as they marched by. Yes, one of my grandfathers went to war in World War II and one of his older brothers was at Lone Pine in Gallipoli. But as a child I only have a hazy memory of my mum looking for the name of her uncle who died in World War II when we visited the War Memorial in Canberra.

Dawn service in Torquay 2013
As an adult it meant I bought the video of Gallipoli and lost it. When I traveled through Turkey, I joined many Antipodeans who watched the film at the hostel after spending a day on tour through the rugged terrain where our soldiers bravely but futilely fought. What made the biggest impression on me that day, was hearing from our Turkish tour guide about how devastating the effect was on the Turks and seeing their war cemetery as well as that of the Australians. Since returning from my travels I have been to the dawn service once at the Shrine of Remembrance in Melbourne.

Golden syrup and butter (actually this is vegan margarine - seems I don't follow my advice in the recipe to use real butter!)
In 1972, Eric Bogle wrote a song called And the Band Played Waltzing Matilda about Gallipoli which included the lines reflecting on dwindling numbers in the annual ANZAC Day parade ‘But as year follows year, more old men disappear / Someday, no one will march there at all.’ However, it seems in recent years there has been a renewed interest in celebrating ANZAC Day. Unfortunately wars continue to be fought and the day now commemorates service in all wars.

With the renewed interest, is a resurrection of the ANZAC biscuit. This is a biscuit I loved making as a child because I loved smelling the butter melting with the golden syrup. My mum made them quite a lot and I mostly had her home-cooked versions rather than what we called ‘bought’ biscuits. Home made biscuits can be different each time, sometimes chewy, sometimes crisp. Now it is quite common to see huge chunky versions in cafes. This year I have noticed that there are sprawling displays of packets of the bikkies in the supermarket.

The frothing as the butter/golden syrup meets the dry ingredients
The ANZAC biscuit gives an interesting insight into the war. These are biscuits made from oats and golden syrup among other ingredients. They are associated with World War I because Australian mothers and wives sent these biscuits over to the soldiers. The recipe was one that would keep forever in the long sea voyages. It just shows how desperate the soldiers’ conditions were and also that many more people than soldiers were part of the war effort.

It seems that during World War I they were not referred to as ANZAC biscuits, and possibly didn’t even include all the ingredients we know and love today. Researchers say that they were originally Soldiers Biscuits, then ANZAC Crispies and then finally in the late 1920s ANZAC Biscuits.

ANZAC biscuits made in 2013
The name ANZAC is protected by the Department of Veterans Affairs but there is an allowance for the word to be used for the biscuits. However, you should note that this allowance only extends to biscuits that use the traditional recipe and definitely not to the use of the word 'cookie' in the same breath. It seems that any divergence from tradition is frowned upon by our government. You have been warned!

When my mum rang this week she said she had made a great batch of ANZAC biscuits from her fail-proof cookbook, Cookery the Australian Way (which was the book we used at high school). So I scribbled it down dutifully on the newspaper where I was doing my samurai sudoku. I was glad to get the recipe from my mum, because I had seen so many versions of the recipe that I was quite confused about which one was the one I knew and loved.

ANZAC biscuits made in 2008
I am so glad I made these because it made me realize that this is my equivalent of what the choc chip cookies seems to be for Americans. As I have said before, the smell of melted butter and golden syrup fills me with nostalgia. These biscuits make me remember being young - wanting to eat all the raw biscuit mixture, being so amazed at the bicarb fizzing up in the golden syrup mixture, and wishing we had bought biscuits. It reminds me of having to keep all the utensils and saucepans with a daub of green paint on them at the green counter in the home economics room at school and proudly taking home freshly baked goods.

When I was young I don’t think I really appreciated my mum regularly baking us cakes and biscuits. How ironic because now I would much prefer homemade ANZACs to any that I could buy in a shop! My mum was right about this being a good recipe - they were flat, soft and buttery. I have checked a few other recipes and it seems this one has a bit less flour and oats than usual which is probably why they spread so readily. Oh, and apparently the recipe is derived from a Scottish recipe. So it is no surprise that E loved them too.

I am sending this post to Stephanie of Dispensing Happiness who is holding an Retro Recipe Challenge event called Your Mother Should Know. It asks us to make a recipe that was popular before our mother was born. I thought it was a hard ask until I realised that the biscuits I was planning came into that category.

Update: I have uploaded some photos from 2013 to replace all by one of the blurry old photos from 2008.  If you want a fancy version, you could also try ANZAC biscuits with cranberries and chocolate but don't tell the traditionalists.

ANZAC Biscuits
(from Cookery the Australian Way)
Makes 16 biscuits (or more)

1 cup rolled oats*
1 cup plain flour*
1 cup dessicated coconut*
3/4 cup sugar*
125g butter, chopped**
2 tbsp golden syrup**
1 tsp bicarbonate of soda
2 tbsp boiling water

Combine first four ingredients in a mixing bowl.

Melt the butter and golden syrup together in a small saucepan. When melted take off the heat. Mix the hot water and bicarb in a separate bowl and add to the golden syrup mixture. Mix and watch it froth up.

Once it is frothing, pour the golden syrup mixture into the bowl of dry ingredients and stir to combine.

Drop teaspoonfuls onto a greased or lined baking tray. Leave plenty of room around them as they will spread quite a lot. I didn’t leave enough room for mine (maybe they were too big).

Bake in 160 C oven for about 10 minutes. My mum gave me the wise advice that your nose will tell you when it is cooked. Leave to cool on tray for 5-10 minutes and then use an eggflip or spatula to transfer to wire rack to cool.

NOTES: 

* I have updated this recipe.  It was previously 3/4 cup each of oats, flour and coconut and 1/2 cup sugar.  The biscuits spread a lot (as you can see in the bottom photo) but I have followed my mum's lead and now make the biscuits to be firmer little discs.

** I know that in America it is hard to get golden syrup - it is possible to substitute honey or corn syrup or treacle. Vegans can substitute margarine for butter. But I believe the characteristic taste of these biscuits really comes from the combination of butter and golden syrup so I encourage using them if possible.

On the Stereo:
Son of Evil Reindeer: The Reindeer Selection

Thursday 24 April 2008

Carlton Farmers Market

Of late there seems to have been an explosion of farmers markets in Melbourne (figuratively speaking). One of the newer markets is the Carlton Farmers Market. It is held on the third Saturday of the month at the Carlton Gardens Primary School, close to the CBD (Central Business District) and just across the road from the Carlton Gardens where you will find the Melbourne Museum and the Exhibition Buildings. Prime real estate but not many farms in sight.

The school is a red brick Nineteenth Century building of arches, gables and chimneys. (I just boasted to E that my primary school was older than this one and he retorted the he could trace the history of his school back to the Twelfth Century – sometimes it is no fun having a Scottish partner!) The farmers market is on the inner city school playground. It is a smaller space than the Collingwood Children’s Farm Farmers Market and nowhere near the size of the sprawling Vic Market. But the Carlton Farmers Market had a friendly atmosphere and lots of fine food to tempt us.

We did the rounds of the stalls, chatting to stallholders and tasting the food. We spent a bit of time talking about spelt at the Knead Bakery. The stallholder told us it was less elastic than regular flour because it was low in gluten but that it smelt like vegemite when it come out of the oven. Another stallholder told us about how they were setting up a home business on the outskirts of Melbourne. We tasted cheese, pesto, prune and walnut log, spicy shiraz sauce and lots of different biscuits. Other stalls displayed olives, wine, honey, plants and gorgeous little cupcakes.

We took away a swag of goodies: orange and poppy seed biscuits, Chef’s Own basil pesto (which is such a lovely brilliant green), chat potatoes, corn , broccoli, brussels sprouts, free range eggs, Milawa cheddar, hemp soap (by Scent Sational Handmade Soaps) and spelt bread.

I will be back here because it is in such a great location and the goods are quality stuff. Afterwards you can walk in the park or a visit to the museum. (We did neither because E was keen to buy a guitar but I wont bore you with the saga.) The main improvement I would like to see is a vegetarian option at the sausage sizzle. But I think it is a great use of space that might otherwise lie empty on a weekend. Schools are a place for learning and a farmers market supports this by bringing us closer to the source of our food.

I am sending this post to Gay at A Scientist in the Kitchen for her event To Market To Market, which asks bloggers to share information about the local markets where they shop for food.

Carlton Farmers Market
Third Saturday of the Month
Carlton Gardens Primary School
215 Rathdowne Street, Carlton
http://www.carltongardens.vic.edu.au/farmers.shtml

Tuesday 22 April 2008

Vegetarian Sausage Rolls

On the weekend I had a yen for sausage rolls. I mean the vegetarian variety, of course. Perhaps my neb at nut roast event has made me nostalgic for food from my childhood. Some might even argue that a vegetarian sausage roll is just a nut roast in pastry.

When I was too young to know any better and ate meat, sausage rolls were eaten at parties or just for light meals (or even sitting in a dressing gown in front of a soap opera, but I can’t mention names)! They were often offered as an alternative to meat pies which we called plasma pies (shudder of horror)! We usually had small sausage rolls that lots of little hands could grab and dunk in tomato sauce.

When I posted about making my version of vegetarian sausage rolls for party food last year, Cindy from Where’s the Beef kindly pointed me in the direction of the recipe she has been using for years. In her post Cindy remembers trips to the local bakery for sausage rolls. Such memories make me nostalgic for a time when I could stop at a bakery and eat any baked goods. I am of course nostalgic for the choice rather than the taste.

Many pie displays now include some sort of vegetarian pie but you still rarely find vegetarian sausage rolls when eating out. Cindy comments that this recipe should be shared with the world and, after finally making them, I can’t help but agree. It is easy and so delicious that I am sure there would be many takers if some enterprising person tried selling these. I thought the raw mixture was unbearably salty but when cooked it tasted so good. They are darker and richer than mine; closer in texture to that of their meaty cousins and packed with flavour.

The main problem is that these sausage rolls look so like the meaty ones that you could be mistaken for thinking they actually were. I mention this problem because it is easy to become paranoid about eating out when a vegetarian. Some meat eaters think it is hilarious to tell me the food they have just served up has meat in it, but it is too close to the truth to seem funny. Most vegetarians will have had the experience of being told that the stock is vegetarian, only to find bits of meat (or a ham bone) floating in the soup.

My mum has embraced the idea of choice and begun to make me some vegetarian sausage rolls when she makes meat sausage rolls but I worry she might mix them up. So I was inspired by the seeds on Cindy’s sausage rolls. I am now wondering if I should suggest my mum puts sesame seeds on my sausage rolls so it is easy to recognise the good ones! I know it seems obvious but it has just never occurred to me before.

Cindy’s sausage rolls with a mug of leftover mushroom stew were wonderful warming comfort food after a lazy Saturday. We even had a few for lunch the next day. This is an excellent version of a classic snack that I would recommend everyone try. Don't ask me who Liz O'Brien is because not even Cindy knows.

Finally, if you are looking for other ideas for filling vegetarian sausage rolls, you might like to try using the nut roast mixture from one of the recipes in the neb at nut roast round-up and baking it in pastry using the same method as in the recipe below.

Updates: I make these sausage rolls regularly so here are a few different versions:
  • Update Nov 2009: If you want a vegan version, see Cindy's vegan sausage rolls where she substitutes tofu for the egg and cottage cheese - I still mean to try it some time.
  • Update 2011: I have tried a vegan version of these sausage rolls that was very good.  I have also tried a gluten free version that worked but the pastry needs work.
  • Update 2014 - made another GF version with gluten free pastry and used GF oats and GF breadcrumbs but needed more oats and breadcrumbs to make the mixture firm enough.
  • Update 2015 - made them using a mixture of walnuts and pistachio.  Took some photos to update the ones I took back in 2008 but left in the old photo with the purple mug.   
  • Update August 2015 - made great gluten free sausage rolls with quinoa flakes and gf breadcrumbs (needed more flakes and breadcrumbs to make the mixture firm enough) and used supermarket gf pastry (Genius).    
  • Update June 2016 - made a vegan version: sausage rolls with cauliflower, tofu and aquafaba.

Liz O’Brien’s Vegetarian Sausage Rolls
(from Where’s the Beef)
Makes about 28 x 5cm (2 inch) sausage rolls

Filling:
3 eggs, lightly beaten
1 cup (125g) pecans, finely chopped
1 cup rolled oats
½ cup breadcrumbs
1 medium to large onion, finely chopped
250g cottage cheese
3 tablespoons soy sauce (I used 2 tbsp tamari)
1 vegetable stock cube (I used 1 tsp of stock powder)
1 clove of garlic, crushed

To assemble:
3 to 4 sheets of ready-rolled 25 x 25cm puff pastry
Beaten egg for glaze
Sesame seeds for sprinkling (optional)

To Make the Filling:
Combine all filling ingredients in a mixing bowl.

To Assemble:
Thaw 3 to 4 sheets of ready-rolled puff pastry. Place the first sheet on a flat surface and cut it in half, into two rectangles. Spoon the non-sausage mix down the centre third of each rectangle. Brush one long edge with beaten egg and fold in the long edges so the one with beaten egg overlaps the other edge.

Repeat with other pieces of puff pastry. Place sausage rolls seam down on a greased or baking-paper lined baking tray. Brush with beaten egg (or milk) and sprinkle with sesame seeds.  Make deep marks with a sharp knife marks to indicate where to cut them after cooking (halves, thirds or quarters).  (You can alternatively cut into rolls and/or make decorative slashes.)

To Bake:
Bake sausage rolls at 220C for 20 minutes. Remove from oven and cut into individual sausage rolls using marks you made before baking as a guide.  (These marks make it easier to cut.  Cutting sausage rolls partway through baking keeps the filling from drying out.)

At this point you can return sausage rolls to oven to bake another 10 minutes until golden brown and serve hot or set aside and bake for 10 to 15 minutes when you are ready to serve.  Sausage rolls can be frozen and baked straight from the freezer (about 15 minutes at 220 C).

Serve with tomato sauce.

On the stereo:
Cross: Tom Hall

Sunday 20 April 2008

A Neb at Nut Roast – the Round Up


Back in March I challenged my readers to have a neb at nutroast (see this post for more nut roast info). The response was a mixture of interest, curiosity and confusion. It seems there are many bloggers who have not encountered the lovely nut roast.

I am pleased to report that 14 nut roasts were sent to me for this event. In addition I made 3 over the period so we have a total of 17 nut roasts of many shapes and flavours (or 16 nut roasts and one imposter!). It is what I had hoped for. I gave quite you a reason to partake of the joys of the nut roast and in return I received a wealth of creativity and innovation. It delighted me to read some of the dialogue around nut roasts in the blogosphere. Finally I don’t feel like the only person in the world in love with nut roast.

Not everyone professed undying love for the nut roast. Quite a few commented quite reasonably that it would not be an everyday dish. But when you see the variety, I hope it will inspire you to cook it occasionally, especially when you want a special vegetarian meal.

I was delighted to see example of roasts that I have only dreamt of trying. Nut roasts were presented in puff pastry, in muffin sizes, stuffed, and panfried in slices. Ingredients I have never encountered in a nut roast were also on display, such as quinoa, spinach, pistachio, flaxseeds, gruyere cheese and shitake mushrooms, plus useful nutritional information and wonderful colour. Something for everyone! Here are the entries in the order in which I received them.

1 Mushroom Nut Roast - Culinary Bazaar, California USA
Dhivya was no newcomer to nut roast. She shared a lot of useful nutritional information about heavenly brazil nuts which she used in her recipe. Her nut roast looks delicious with a drizzle of tomato sauce. Her description of it as sinfully rich and addictive sounds spot on! And she wisely warns that you can certainly have too much of a good thing which is why she does not make nut roasts too often!


2 Cheese and Nut Roast - Nourish Me in Melbourne Australia
Lucy made a variation on Deborah Madison’s nut roast recipe. Her use of wild rice, shitake and porcini sounds a bit more exotic than the usual British stodge! But Lucy was doubtful about the merits of a dish with so much cheese and nuts. She ate it with a daub of tomato and basil sauce and was then ready for a truckload of salads and veggies. However, it is not her first nut roast so Lucy is open to others.

3. Cheesy Nut Loaf - Green Gourmet Giraffe, Melbourne Australia
This nut roast is an old recipe that I have tried a few times. In addition to nuts it is full of rice, cheese and vegetables. On this occasion I enjoyed it as an alternative to my mum’s roast lamb when my family got together for Easter Sunday lunch. It was served with my mum’s dazzling array of vegetables – roast potatoes, roast pumpkin, cauliflower cheese and peas.

4 Nutloaf with Shitake Mushrooms - Confessions of a Food Nazi from Melbourne Australia
Another Outspoken Female reminisced about her happy Christmas dinners of nutloaves in London many years ago. She kindly drew deep into her memories to come up with a pleasing nut roast recipe made with tofu and shitake mushrooms, served with roast vegies. I love her relaxed way of measuring the ingredients which will appeal to others who take quantities with a pinch of salt. Check out her wonderful retro tableware for that old-school 1970s nut roast experience.

5. Pistachio Cashew and Spinach Nut Roast, Little Bits, Pacific North West
LisaRene moved on from nut balls to discover their big brother the nut roast. A newcomer to nut roast, she was adventurous with her recipe and had no regrets. She also used tofu and lots of spices. The photos of the slices show a fantastic brilliant green loaf which was so good LisaRene ate it plain without any sauce. It sounds as though her guests might have some delicious nut roasts served up to them in the future.

6 Fantastically Mushroomy Walnut Roast - Munchkin Mail, Warwickshire, UK
Lysy was unexpectedly smitten by nut roast. She overcame her bad experiences in being served nut roast and her dislike of nuts to make a magnificent and nutritious nut roast. Lysy discussed the nutritional merits of walnuts and also added lots of yummy seeds. She served it with sweet potato chips, pear and leaf salad and a bit of broccoli. I particularly love her instructions at the end of her recipe – ‘serve and enthuse’!

7 Quinoa Nut Roast - Addicted to Cooking, Auburn, Alabama, USA
I was excited to get Marie-Lies’ submission as it was the first with quinoa I had seen. She used flaxseeds to make it vegan as well as gluten free. She served it with what I think are vegetarian Native Foods ‘chicken’ nuggets and sweet and sour sauce. Her mum and boyfriend ate it with her and all found the result pleasing. Marie-Lies says she will make it again but will be experimenting with different combinations.

8 Parsnip Nut Roast - Green Gourmet Giraffe, Melbourne Australia
This nut roast I made was full of mashed parsnips which gave it a distinctive taste. I substituted soy flour for the egg and was pleased to find it was quite easy to veganise the recipe. Deciding it was impossible to be simple with nut roasts I served it with a British-inspired accompaniments of mashed potato, gravy, sprouts and little Yorkshire puddings.

9 Stuffed White Nut Roast - Where’s the Beef? Melbourne Australia
Cindy dusted off an old recipe that had caused her grief in the past. Nut roasts have a way of sticking to the loaf tin or the paper, so she has found it necessary to line the tin with well-greased baking paper. Wise advice indeed! She was ably assisted by her partner in crime (so to speak) Michael, who helped with all the chopping and sautéing required. The result was a beautiful golden crusted loaf (which wasn’t afraid to part company with the paper) with a parsley and lemon stuffing. Sounds worth the perseverance! And as you will see from the photo, Cindy also enjoyed leftovers sliced in a sandwich.

10 Mushroom Nut Roast in Puff Pastry - Lisa’s Kitchen, London Canada
Despite being a beans and grain kind of girl, Lisa did some research and come up with a delightful looking nut roast wrapped in puff pastry. She mixed her nuts with mushrooms, quinoa, sundried tomatoes and, of course, loads of spices, and served it with a salad and salsa. Although she does not usually serve nuts as a main dinner feature, Lisa was pleasantly surprised with the results. It looks superb.

11 Michaelmas Loaf - Green Gourmet Giraffe, Melbourne Australia
The final nut roast from Yours Truly. I delved into the history books to find out about the history of the nut roast and found it was indeed alive and kicking (to coin a phrase) at the turn of the century. To complete the research, I made a nut roast from a 1910 cookbook which was moulded and basted to look a bit more like roast meat than my usual ones. It was a bit nuttier and drier than the nut roasts I am accustomed to but with some gravy, roast potatoes, roast pumpkin and roast peas, it did make me feel like I was eating one of my mum’s roast dinner!

12 Nut Roast Extraordinaire - Diet, Dessert and Dogs, Toronto, Canada
After being won over by the nut roast earlier this year, Ricki was eager to participate in this event. She is eloquent in proclaiming undying affection for the ‘meal in a brick’. Even her carnivorous HH enjoyed it immensely. Her nut roast was chock full of vegies, herbs, wine, oats, cilantro (fresh coriander) and flaxseeds, as well as brazil nuts and cashews. Served with a kale salad, it had lots of nutritional benefits and looks wonderful.

13 Walnut and Mushroom Roast - Eat Me, Delicious, Vancouver Canada
Ashley was intrigued by this ‘mysterious loaf’. She thought she was embarking on a new experience until her mum reminded her that she had made one years ago. That gave me a laugh. Nevertheless Ashley was delighted with the results of this herby tomatoey nut roast and was happy to eat it just with some steamed broccoli. It is a recipe I have blogged before but I didn’t manage to create such a lovely rosy hue. She is now planning to make nut roast for future Thanksgiving meals and anytime meals.

14 Mini Herbed Tomato Nut Roasts – Jugalbandi, North Western USA
Bee and Jai also made nut roast full of tomatoes and herbs but they also added gruyere cheese, roasted red peppers and nutritional yeast. The herbs came from their garden and included the intriguing sounding pineapple sage. Their nut roast was cooked in muffin moulds and looked stunning served on slices of tomato. I liked the advice in the recipe that the batter will not rise like a cake. Something that I take for granted but would be helpful information for novices. It is also worth reading Bee’s story of her university serving such bad nut roast that she preferred the kangaroo stew. Glad that she liked this one more!

15 Nut Roast - Lost in the Kitchen, Belgium
Joanna overcame her suspicious of nut roast, despite the mixture smelling like something meat eaters such as herself would not want for dinner. Once it came out of the oven she loved it so much that she was looking forward to going home for the leftovers the next night. Hers was full of vegetables, cheese, oats and Worcestershire sauce. It didn’t brown as much as she wanted, so she panfried it in herb butter and served it with apple sauce. Sounds wonderful.

16 Cumin, Carrot and Cashew Nut Roast - A Wee Bit of Cooking, Scotland
Wendy made wee individual nut roasts in ramekins (now why haven’t I thought of that!). They look cute and shapely, served them on a bed of simple green leaves. This was the first nut roast Wendy has made, despite a love of nuts. She found it absolutely delicious and is now looking forward to ‘more nutty roasty experiment’.

17 Orange and Brazil Nut Loaf - Tinned Tomatoes, Scotland
Here is the imposter! Holler was full of good intentions and went out to buy the ingredients for her nut roast, having made her first one some months ago. But somewhere something went wrong. She refused to be held hostage by a blog event and followed her whims. Instead of a savoury nut roast, Holler sent me a sweet orange and nut cake! Tut tut tut! I have included it because I know she has her heart in the right place and because it illustrates just what a nut roast isn’t. It isn’t sweet, it isn’t airy and it isn’t a cake. Full marks to Holler though for finding a cake that has a resemblance to a nut roast! And it does look scrumptious.

Thank you to everyone who participated. (Please let me know if I missed anyone.) I feel inspired anew by all the fabulous versions of the nut roast. I am sure I am not alone in wanting to try out these nut roasts very soon.

Update: for more nut roasts, go to my Neb at Nut Roast post where I am keeping an ongoing list of the ones I try.

HoTM French Toast with Fruit

I’ve never eaten French toast because I couldn’t bear the thought of bread soaked in eggs. I once had a housemate who made it regularly and generously offered to make it for me but I shuddered when I watched him cracking open egg after egg. Viewing it on menus and neighbouring plates in cafes has filled me with desire but not enough to overcome my egg-aversion. But there have been days I have thought I would love to eat it if only it wasn’t so full of eggs.

So I was excited to find there are vegan versions of French Toast. This weekend I decided I would make some for brunch. When I told E of my plans he surprised me by being unusually knowledgeable.

Now I expect him to know anything and everything about music and movies. Last week when a work colleague asked what movie was being filmed in Melbourne with Nicholas Cage in it, I didn’t have a clue but was confident that E would know. Within an hour of emailing him the question, I got the answer. Apparently the movie is called Knowing. But most culinary matters are beyond E’s ken.

So I was impressed that he told me his granny used to make him French Toast and that he had learnt from her that it was a recipe used in wartime. He thinks that this was because it made eggs go further in days of rationing. So I had to go online and investigate.

The Food Timeline says that French Toast can be traced back to the Roman Empire. It is known by many names in many countries. The most poetic is the French name ‘pain perdu’ which literally means lost bread and alludes to the dish being a way of reinvigorating stale bread. It is popularly thought to be a humble recipe employed to use up every scrap of food, but in fact was also made with the finest of foods and spices as a rich man’s fancy. Nothing about the war. Nor did Wikipedia enlighten me. In fact the only reference I could find to French Toast in the war was a claim that the name was changed from German Toast to French Toast in America. I will keep searching and would welcome any information.

So, it seems that French Toast has a fine heritage, but I cannot substantiate E’s claim. However, I can tell you that he does know more about eggs than me because he loves them. In fact, the first time we ate out together he had a fried egg roll at an internet cafe! I suspect it was covered in tomato sauce.

Yes, E likes eggs and tomato sauce. So when I made the French Toast he was surprised when I served it with fruit. He had expected it with tomato sauce. I asked how his granny served it and he said she just made it as a snack for him when he was a wee boy.

I had decided I would make the French Toast for the Heart of the Matter event which this month is hosted by Joanna and the challenge is a healthy brunch. Joanna is feeling a bit jaded and has asked for inspiring ideas for a healthy brunch. I thought I would serve the French Toast with an interesting combination of baked fruit.

I had some rhubarb left from the bunch that I bought last weekend. I also fancied trying my hand at roasting strawberries after being impressed by SweetDesigns' success recently. And lastly, I wanted to make a version of my mum’s bananas with lemon juice and sugar that she made us when we were kids. I didn’t put a lot of sugar in but served the fruit with a generous amount of maple syrup. I was also pleased to be able to use my pomegranate juice and my candied orange but orange juice and orange zest would work as well.

The French Toast didn’t crisp up the way I had hoped. It was only by the time I got to the third piece of toast that I finally achieved the golden brown fried look. I know that frying it in a pool of oil is one alternative but I intend to try some other dipping batters to see if others are more compliant. This one was interesting but it didn’t really enthuse me. Did I tell you I don’t really like soggy bread much either? And maybe the fantastic heavy wholemeal sourdough from Hope Farm was not the right bread for the recipe. I will try French Toast again but next time I think I will take E’s advice and eat it as part of a savoury brunch.

On the other hand, the baked fruit was heavenly but I think I would prefer it with pancakes. I followed a recipe which suggested rhubarb would take 45 minutes to bake and I thought I had lots of time for the laundry, watering the plants and blogging before breakfast but it turned out that 20 minutes was ample. E thought the rhubarb a bit tart but it was nothing that couldn’t be fixed with a bit more maple syrup. I have written a recipe for the fruit which is a composite of what I did and what I would do next time. Other fruits could be used but unfortunately I am less inclined to turn on my oven summer when stone fruits are plentiful. However, I am looking forward to experimenting more with baking fruit for brunch.

French Toast with Baked Rhubarb, Strawberries and Bananas
Serves 4-6

French Toast

(from Vegan Family Favourites by Erina Pavlina)

¼ cup almond butter
2/3 cup milk
1 tsp cinnamon (optional, I just gave it a good shake)
6 slices of thick bread
Oil for frying
Baked fruit (recipe below)
Maple syrup to serve

Place almond butter, milk and cinnamon in a food processor and blend til smooth. (I did a bodgy job because I was trying to avoid the noisy food processor so early in the morning but in retrospect I would advise it.)

Pour milk mixture into a shallow dish (like a pasta bowl). Heat a heavy frypan. Pour a drop or two of oil into it and wipe with a paper towel so the surface shines with grease. Place a piece of bread in the milk mixture and flip over so both sides are soaked in the milk. Place soaked bread on the frypan. Fry a few minutes either side over medium heat or til bread is golden brown on both sides. Serve with baked fruit and maple syrup.

Baked Rhubarb, Strawberries and Banana

1 cup rhubarb, chopped into 1 inch lengths
125g strawberries (½ a punnet), hulled
4 tsp of sugar (or try maple syrup or agave nectar)
20g candied orange, chopped finely, or orange zest
¼ cup pomegranate juice, or orange juice

1 medium banana, chopped roughly
Juice of half a small lemon
1 tsp sugar

I couldn’t find a baking dish the right size and used separate ramekins for the rhubarb, strawberries and banana. I think in retrospect I would put rhubarb and strawberries together. So you can either divide up the sugar, orange and pomegranate juice and bake the rhubarb and strawberries in two ramekin dishes or bake together in a small baking dish. Toss fruit with juice, sugar and orange to coat. Cover with foil and bake in a 200 C oven for about 20 minutes or until soft but still keeping their shape. (Check and stir after about 10 minutes.)

Once the rhubarb and strawberries are in the oven, toss banana, lemon juice and sugar in a ramekin. Cover with foil and place in oven for 20 minutes. (Check and stir after about 10 minutes.)

Serve hot baked fruit over French Toast (recipe above), pancakes or waffles. If not sweet enough douse in maple syrup.

On the Stereo:
John Denver’s Greatest Hits