Sunday, 13 March 2016

Edinburgh legend: The Baked Potato Shop

One of my fond memories of living in Edinburgh was eating vegan haggis on baked potatoes from the Baked Potato Shop at the top of Cockburn Street.  It was close to work so it was quite convenient unless the Edinburgh Festival was in full swing and queues out the door.  I was delighted to have an opportunity to go there again this week.

I opted to have some coleslaw with my vegan haggis on a potato.  This cost a more than reasonable £5.40.  The photo does not do it justice.  It was huge.  I had a good appetite from walking around the shops and I love baked potato skins.  Even so, it was too much for me.  I really loved the combination and kept feeling like I was eating cheese but I think I was tasting the haggis and potato combination.

The reason I didn't take many photos inside is that there is very little room to sit.  Hence I sat at the only table with a couple of other patrons who were very friendly.  We chatted like old friends.  It made me feel a little shy of taking many photos.  

So I took a few photos outside instead.  Cockburn (pronounced Co-burn) is one of the first places I ever saw in Edinburgh.  Perhaps this explains my fondness for it.  Or maybe it is just that the downward curve fascinates me.  Or is it just that it has always had lots of interesting shops.  Including the Baked Potato Shop.  It is not in the below photo which is taken looking up Cockburn Street.

The Baked Potato Shop is one of Edinburgh's vegetarian gems with lots of vegan options.  According to the sign, the shop was established in 1983, though I think it closed for a period.  I would love to go back on this trip but there is so much to visit and it is less practical when with E and Sylvia.  It is a tiny shop that is not suitable for family groups or strollers. However I highly recommend it.  And as an added bonus, you can purchase a bag of Mackie's Haggis and Cracked Pepper crisps that is suitable for vegans and vegetarians.  Just brilliant!  

The Baked Potato Shop
56 Cockburn Street
Edinburgh Old Town
0131 225 7572
Open every day: 9am - 7pm
Facebook page

The Baked Potato Shop Menu, Reviews, Photos, Location and Info - Zomato

Friday, 11 March 2016

Edinburgh Dispatches: jetlag, camera, ready meals etc

So here we are in Edinburgh, feeling a little topsy turvy but enjoying seeing familiar faces and places.  The jetlag is still keeping our heads a little fuzzy.  I found Sylvia eating cocoa pops at 2.30am this morning and then watching Donald Trump on the television soon after. 

Before we left home, one of my challenges was my DSLR camera.  It has a problem communicating between the lens and camera!  Fortunately I was able to borrow a camera from my brother rather than having to make a hasty purchase.  This Nikon J15 is a lovely little compact camera though I am still finding my way around it.

Scotland has offered a wealth of Minion merchandising for Sylvia.  This is what greeted her when we met up with E.

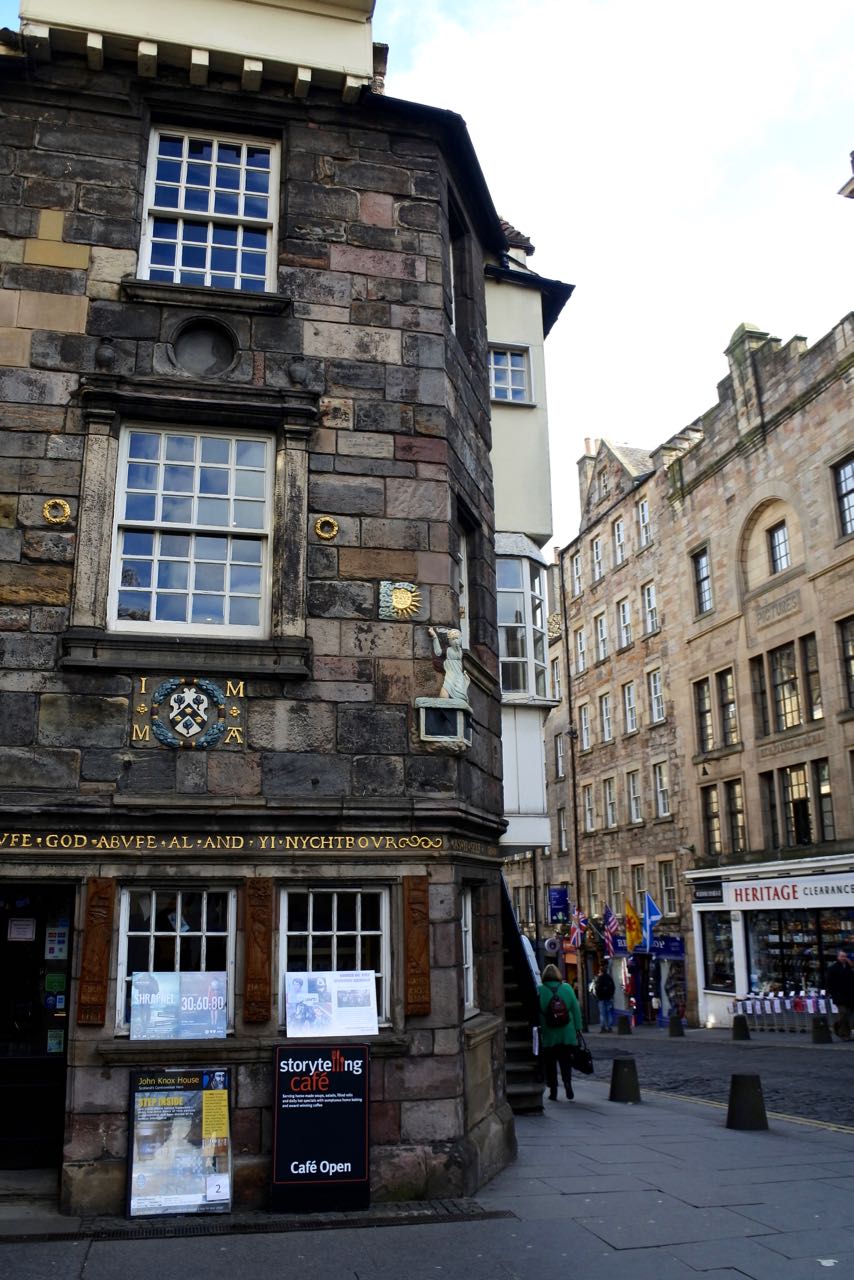
We went into town yesterday.  The buildings of the Old Town never fail to fill me with delight.  We visited the Museum of Childhood and had lunch at the Scottish Storytelling Centre.


Then we hit the shops, bought Minion pjs, laughed at Marks and Spencer selling a "Posh Cheese on Toast" and had crisps and Iron Bru at the BHS cafe which had the magnificent view of the Castle at the top of this post.

We went shopping at Sainsbury's.  I found some clothes on the sales rack.  It seemed rally odd to try on clothes in the fitting rooms in a supermarket!  We also bought lots of "ready meals" because we are moving into a new holiday flat tomorrow.  I really enjoyed some Covent Garden Vegetable and Soupergrain soup last night.

And while it is lovely being in Edinburgh, the absence of E's dad looms large.  It is sad not to be able to visit him and tell him about our day.

Tuesday, 8 March 2016

How to make a minion pinata

Today I bring you my pride and amazement that I made a minion pinata for Sylvia's birthday party.  I wont tell you it was easy.  For a while I thought it was.  Papier mache was not so hard but working out the lollies and doing the fringing too some time.  But it is not that difficult and it is heaps of fun.

Of course if I had known that we would have had all the upheaval of a death overseas I might never have started it but I am glad I did it and Sylvia just loved it at her party.  So it was worth every night spent saying up late gluing on fringes in front of old re-runs of Sex and the City.

Here is my step by step lowdown for anyone who feels brave enough to attempt making a pinata and wants my two cents.  I did quite a bit of online research but the main sites I used were WikiHow for the basics and then Raising Whasians and Le Coin de Mel who made Minion pinatas.

The Shape

I followed Le Coin de Mel and tied two balloons together and wrapped some paper (a paper bag) around them to make a long round shape.  I found this quite challenging.  It need quite a bit of sticky tape.  It was easier if the balloons were the same size.  It was hard to get the paper nice and smooth.  Even at the end the pinata was not quite smooth around the middle but it wasn't so obvious with the fringe.

WikiHow showed how to pop the balloon and take it out once the papier mache was started.  It was a bit more challenging with the two balloons.  I think I poked a skewer in to pop the second balloon and then I used the long long handled tongs to pull out the two balloons which of course slid to the very bottom of the balloon.  (This was when I put the lollies in.)
 
The Papier Mache

Like Mel I made my own papier machez paste.  I mixed 1 cup flour, 1 1/2 cups water and about 2 tbsp salt.  I used this for the first one and perhaps made another batch but I did leave it covered in the kitchen between layers of papier mache over a few days and it was fine.  The salt stops it souring too much and preserves it.  It is quite different from the glue I remember using as a kid and is quite thick.

The sites said to either dip strips of newspaper in or to run your two fingers down either side of the paper strip to squeeze off excess paste.  I started this way but found if paste was on both sides it was really messy to do papier mache and if I tried to squeeze it off the paste it broke the paper.  So I found I just used my hands to slather on just enough paste.  Perhaps a brush would help but when you are that messy hands will do.  It was quite relaxing doing it and a nice task to do with a friend (thahks Kerin).

I did 4 layers of papier mache over a few days.  They need to dry completely between layers.  I started by hanging it from the clothes line which I think helped it dry quickly but later I found much easier to dry on a wire rack that I use for cooling cakes out of the oven.  A dish rack might also do the trick

The Lollies

After two layers of papier mache I was convinced to put the lollies in.  (If you are American I mean candy and if you are British I mean sweeties.)  I used a sharp knife to cut a hole big enough to put some lollies in.  The was the moment I took the balloons out of the shape.

I had found some minion chocolate coins and then bought yellow lollies.  Bananas, sherbets, pineapple liquorice and crunchies.  First dilemma was that I then found they should be wrapped.  Luckily Kerin was about and helped me wrap the bananas and liquorice in clingfilm.  She had a great production line going that I wish I could explain.

Next dilemma was finding the balance between a generous shower of lollies from the pinata and not loading up the kids with too many lollies.  Once the lollies were in and we had papered over the hole was that it seemed really heavy.  And that meant too many lollies for the kids, even if it didn't fall off the clothes line before being poked with a stick.  While Sylvia slept I cut another hole and tipped out some lollies.  In the end there were about 700g of lollies for 6 kids.  On the day there was some collateral damage from pounding the pinata so that seemed about right. 

The String 

Once my lolly worries were over, I worried about having the pinata strung up so it held securely.  It might have been easier to weave some string inside it when I was doing the lollies in but I missed the moment.  Instead I had a big plastic needle I could use to poke string in a little hole made with a skewer.  Getting the plastic needle to come out again was challenging.  I ended up sticky taping the needle to the skewer and finally getting it through.  Next time I think I will make holes when I add lollies.  I made three places the string came out so it was hang properly.

The Fringe

The part that took me the longest was sticking the fringe on.  It was far more fiddly and time consuming than the papier mache.  At times even tedious and best done in front of the tv.  Fortunately I had a head start because I asked my nieces to help cut the fringes when they were at an earlier birthday lunch.

I regret I have lost the link to the person who advised on gluing the fringe.  One good piece of advice is the add a dribble of water to white gloopy glue so it brushes on easier and goes further.  It also kept wet if I left it overnight.  To cut the fringes, we folded over pieces of tissue paper, cut into strips (about 5-7cm wide) and then cut fringing on each strip.

Once ready to glue, it was a matter of brushing a line where the top of the strip (without the fringes) would go.  I found that it was easier to do one side, let it dry and turn over the do the other side.  This way, the pinata would not press down the fringes into the glue while drying.  The top and the bottom were hardest but I liked the crazy minion hair (a mullet!) at the top and trying to neaten up fringes was scissors was just asking for trouble!

The Face and Details
I used the same Minion printables as Mel.  It did not have a long enough black eye strip so I made my own out of black paper.  We also coloured in a mouth.  Sylvia was very pleased she drew and coloured in the mouth.  And for the blue bottom I printed a  Gru 'G'.  Party hat is optional!

The Party

At the party, we hung the minion pinata on the clothes line and had the kids line up with a small stick that was a wardrobe rail we had hanging about.  It seemed to take ages to break it and then the poor minion lay on the ground and got whacked a bit before we just tipped the lollies out.  The kids loved it.

I kept the sweet food to a minimum and only put a few toys in the party bags.  We did the pinata last and gave each kid their party bag to fill up with lollies from the pinata and take home.  It was fun to see them sitting on the floor before they left with their lollies spread out comparing what they got.  I was pleased there was a bit of sharing and swapping among the kids to make sure everyone got a reasonable amount.

So the pinata was a great success.  I think Sylvia might want one every year but I am not sue I am up to that.  However I saw someone saying it is a lot of work that gets smashed to bits.  I disagree, it is lots of work for lots of fun.  And at the end, we didn't have to find somewhere for it to live in the house.

More about the minion party.

Sunday, 6 March 2016

Minion party with minion cake

As soon as Sylvia's party finished last year she was planning for this birthday.  There was many ideas.  Somehow the Minion idea stuck.  As we had both a family lunch and a friends party, I started planning well in advance.  Which was just as well, because before either gathering, we heard the Sylvia's grandfather had died in Scotland, which made the birthday more stressful than I had anticipated.  However we got on with it and she had a great time.

Sylvia asked for a minion cake at both the family lunch and her party.  That was fine, given it was a fairly simple cake.  It actually made it easier making it the second time.  The biggest challenge was finding the silver for the rim of the goggles.  I bought expensive silver dust in Spotlight and then found cheaper silver sugar in Woolworths.  In the end we used them both but I probably wouldn't have if I had checked Woolies first.

The silver dust was meant for painting fondant but worked well in painting the moulded fudge.

I was glad I had kept the food simple for both occasions.  The family lunch ended up being more than I expected as my family was very generous with bringing along food.  I made sausage rolls and my mum cut vegies to dip in hummus.  My mum also brought delicious cheese scones and beetroot and goats cheese quiche.

My mum also brought along some lamingtons and pavlova including a special pav for Sylvia with banana and no cream.  My sister in law Erica made a lovely dense gluten free chocolate cake and my sister Fran made a really pretty sponge cake that was heart shaped with sprinkles all over it.  I had some fruit as well.

For Sylvia's birthday she took minion cupcakes (inspired by Betty Crocker) into school.  Again they were fairly straightforward with marshmallows, liquorice strips and a black icing tube.  (Yay for the simplicity of the minion design!)  We made them the night before.  In fact after I made banana cupcakes (based on this banana cake) I iced the cupcakes and Sylvia did the decorations.  She had such a lovely time doing it that I did not interfere with my ideas on how it should be done.

We had so much food for the family lunch and party that Sylvia's birthday tea was kept simple.  Three minion cupcakes were kept aside and I made pizza while she played with a friend.

The party was a more elaborate affair than the family lunch.  We started shopping for bits and pieces a few weeks in advance.  Minion paper plate, cups, serviettes and a table cloth were easy to find.  Minion party bags were not.  So we made our own.

I used the bag making method we used a couple of years ago and Minion printables.  Fortunately I roped my nieces into helping out with bits and pieces of preparation at the family lunch including some of the bags, bunting and pinata.

By Sylvia's party, E was in Scotland with his family.  My mum and a friend came to help on the morning of the party.  My mum cut her thumb badly on a broken cup but this wasn't enough to stop her helping out in all sorts of ways.  Kerin also helped with fairy bread and to put together the bunting.  And another friend came and helped put together Pass the Parcel.  It really does take a village to organise a party and I am very grateful for all the help.

The kids arrived and soon after had lunch.  I had decided the food had to be yellow or blue.  Which is pretty hard.  We had sausage rolls, yellow capsicum, cheese, corn chips, tomatoes (orange because no yellow ones about), and corn.  The pedant in me really wanted to serve sausage rolls with yellow mustard but kids like traditional red tomato sauce!

There was party games.  Pin the eye on the minion using printables.  Pass the Parcel was an activity based game where each kid found a direction to do an activity when the parcel arrived at them (star jumps, silly jumps, hop on one leg etc).  This worked ok with only 5 guests but might be hard with a really large group.  The last kid won a packet of minion biscuits.  We were also going to have a Minion (serum and jam) version of scarecrow tiggy but it didn't quite work this year.  When the kids got a bit ratty, Kerin took them inside to colour in some minion pictures.

One moment it was halfway through the party and seeing it will never end and then next we were doing the cake and needing to do the pinata because it was almost the end of the two hours we set for the party.  Alongside the minion cake we had blue and yellow fairy bread and a fruit plate with mango, pineapple and peaches.

Lastly we had a minion pinata.  I wrote a separate post about it.  It was a great success.  I had not served much sweet food and had just put a little minion toy, a bouncy ball and a smiley magnet in the party bags.  The kids then filled their party bags with lollies (aka candy or sweeties) from the minion.

Sylvia is totally obsessed with Minions right now.  She loved all the birthday celebrations and also all the minion gifts.  Of course there were also non-minion gifts that she really enjoyed too and is getting great entertainment out of.

I am sending this cake to Lancashire Food for We Should Cocoa.  The theme is eggs and the cake contains eggs but the minions also look a little like eggs!

How to make a minion cake
Adapted from Betty Crocker (and can be seen step by step)

You will need:

One rectangular cake such as a banana choc chip cake (below)
One batch cream cheese frosting (see below)
Yellow and Blue food colouring
Liquorice wheel
Mint Pattie or Coconut Rough
Small fudge squares
Silver dust and/or sugar
Chocolate melts

Firstly make the coloured frosting.  Take a generous spoonful out first and set aside for the white of the eye.  The divide frosting into one third and two thirds.  Colour one third blue and two thirds yellow.

Now cut the cake into a long oblong, trimming about an inch from each side and as little as possible from the top and bottom.  Use a pastry brush to brush away crumbs.

Mark the divide between yellow and blue as in the picture.  Frost the whole cake, the bottom third blue and the top two third yellow, being careful where the colours melt.  Run a thin strip of liquorice along the divide between yellow and blue sections.

Make the silver rim for the eye.  Mould the fudge into a round ring, checking against the Mint Pattie or Coconut Rough for size.  The second time we made the cake, the fudge was really soft so we put it in the freezer a short while and this made it easier to work with.  Brush with a little water and sprinkle with silver sugar or use a little water with the silver dust to make a silver paint to paint the rim.  Or paint and then sprinkle rim.

Frost the Mint Pattie or Coconut Rough with the white icing.  Place on the cake.  Carefully place silver rim around it.  Place a chocolate melt on the white of the eye.

Place two chocolate melts on the blue section to represent buttons.  Use liquorice to represent the strap holding the minion goggles and the hair above the eye.

NOTE: the first time I baked the cake the day before and decorated it on the day, but the second time I baked the cake early the day before and decorated it that afternoon.

Banana choc chip cake
Adapted from Green Gourmet Giraffe

250g butter or margarine
1 cup brown sugar
2 eggs
4 to 5 mashed ripe bananas (Makes about 2 cups - I used 4)
1/4 cup yoghurt (optional)*
1 tsp apple cider vinegar
3 cups flour*
2 teaspoons baking powder
2 teaspoons bicarbonate of soda (baking soda)
1/2 teaspoon salt
1/2 teaspoon cinnamon
1 cup choc chips

Cream butter and sugar.  Beat in eggs and then bananas.  Gently mix in remaining ingredients.  Scrape out into a greased and lined swiss roll tin (13 x 9 inch baking dish).  Bake for 40 minutes at 190 C or until golden brown and a skewer inserted in the middle comes out clean.  Leave in tin 10 minutes and then cool on a wire rack. 

*NOTES: The first minion cake was gluten free replacing the flour with half almond meal and half Bob Red Mill Gluten Free Flour Mix (which includes xanthum gum).  I forgot to put in the yoghurt and it cooked really fast - about 20 minutes.  It worked well but could have had another 5-10 minutes.  The second minion cake was made with half white and half wholemeal wheat flour.  I added only 1/4 cup yoghurt and 1 tsp vinegar rather than the 1 cup of yoghurt in the recipe I was following.

Cream cheese frosting
Downsized from taste.com.au

165g cream cheese, softened
85g butter, softened
2 cups icing sugar
food colouring

Beat cream cheese and butter with electric beaters until pale and creamy.  Beat in icing sugar gradually.  Colour with food colouring as desired.

On the stereo:
Songs in the Attic: Billy Joel

Thursday, 3 March 2016

In My Kitchen in March 2016 and travel plans

In my kitchen lately we have had upheaval and busy times.  Fortunately we have also enjoyed generosity and good food.  The next month will be even more crazy. 

You see, my father in law died in Scotland recently.  It was very sudden and I am so sad that it has been some years since we have seen him.  He was a dear gentle generous man with a great sense of humour and will be missed by many.  E has gone over to be with family and Sylvia and I will head over next week for a month with a little time in Paris as well.  And in the midst of this upheaval is Sylvia's birthday and we have had a handyman getting a few things sorted around the house.  I imagine that blogging will slow down but I hope to write about some of the places we visit. 

Any recommendations for places to eat good vegetarian good in Edinburgh and Paris would be much appreciated.

And now on with my monthly kitchen update.  Starting with these gorgeous roses from our garden.  Thanks to my mum's help they have flourished and are a joy to behold.  I have even learnt a bit about pruning from her and now and helping with keeping them healthy.

It has been the month of tomatoes.  We have been buying lots from the shops and roasted some cherry tomatoes for a salad that tasted good but looked such a mess.  The ones in the top right hand corner are grown by my brother in law and were great in a simple tomato sauce to serve with dinner.  We have also had some from our cherry tomato plants in our front garden but Sylvia eats them too quickly for me to photograph.

We have had a few generous parcels from overseas lately.  These baking goodies are from Scotland (thanks Anne) and I am looking forward to using them when life settles down a little.

I had great plans for making some different sorts of dumplings and then I decided I really liked Nicki's vegetarian dumplings that I have made before.  They were lovely fried both sides but I still can't get the hang of frying one side and then steaming.  (When I tried frying and steaming the fried sides were too dark.)  However since then I have seen Nupur's dumpling recipe and want to try it.

I made bunting out of some craft papers.  I bought a hot glue gun to help but I am not sure if it was any better than other glue I have.  I was pleased with my bunting though.

I made these burgers from Vegetarian Burgers Every Which Way.  I think they might have been the quinoa, red bean and walnut burger.  I really enjoyed them.  They were similar to the Vegemite Burgers I made recently.

We made vegan banana french toast a few weeks back.  One thing I had about French toast is the wasted dipping mixture if we don't use it all.  So I tried frying it like a pancake. It was a bit 'eggy' for my liking and a mess when I flipped it.  (Yep I know it doesn't have egg in it but I don't know how else to describe the texture.)  Maybe if I added a bit of flour it might work for me.

After making these aquafaba crepes I had heaps of chickpeas leftover.  Note to self to remember to make lots of mock tuna salad with surplus chickpeas.  I love this salad so much.  It makes a satisfying dinner or an easy lunch. 

While making notes to self, must remember next time I buy smoked paprika in a plastic tub, I should put it into a proper jar before storing it above the stove.  Not only did a clumsy moment mess up my stove in a big way but it also reminded me how much colour residue is left by smoked paprika.

Finally I can't finish this post without a Minion moment.  Sylvia is totally obsessed by this cute little yellow fellas lately.  These biscuits were pretty ordinary and just a marketing gimmick but she loved them.  I can promise that there will be more Minions on the blog.

I am sending this post to Maureen of The Orgasmic Chef for In My Kitchen.  It is an event where bloggers around the world share what is happening in their kitchens.  Please head over to Maureen's blog and visit some other bloggers or even join in (by 10th of each month).

Tuesday, 1 March 2016

Squeezy bottle vegan pancakes - fun shapes and a banana sourdough variation

Sylvia has turned against our formerly favourite banana oat pancakes in favour of drawing pancake shapes with squeezy bottles. It suits me not to have eggs in them as we don't have eggs in the house all the time.  So I have adapted Isa's Vegan Brunch pancake recipe.  I used this recipe a few years ago but have found it needed further tweaking.  Now we are making them quite often and so I can claim they work.

One important change to making these pancakes has been to blend the mixture really well.  Finding lumps of flour clogging up the nozzle of the squeezy bottle is not great when drawing.  I tried putting in oats on the weekend they worked as long as they were well blended.

Over Christmas we had fun doing festive pancakes in green and red using food colouring.  Above is a Christmas tree, present, wreath and stocking.

We had my niece over for a sleepover during the holidays and she loved doing some drawing.  Above is the car.

I even made a new avatar for my blog with a green gourmet giraffe.  However my enthusiasm for food colouring has been waning.  We have tried some beetroot powder which I like and even just a little turmeric. 

Above are a heart, stocking, angel, swirl, giraffe, birthday cake, pig, another angel and a house.

And most recently there has been a spate of minion love in our house.  (More on that later.)  So I have had a go at a minion pancake which wasn't brilliant but hopefully the picture will show the process of drawing the shapes.

We will continue having fun with drawing shapes.  Does anyone have favourite shapes to draw?  I run out of inspiration.  And making new shapes keeps the pancakes feeling like something new.  Nothing stays the same here too long!

I am sending these pancakes to Healthy Vegan Fridays.

More vegan breakfast ideas on Green Gourmet Giraffe:
Chocolate muesli (granola) (v) 
French toast with coconut (v)
My breakfast burritos (gf, v)
Potato scones (v)
Roasted vegetable tofu scramble (gf, v)
Sausage patties (gf, v)

Isa's Vegan Pancakes
Adapted from Vegan Brunch

1 1/4 cup plain flour
2 tsp baking powder
1/4 tsp salt
1 1/4 cup soy milk
2 tbsp maple syrup
2 tbsp canola oil
1 tsp vanilla essence
1 tbsp water, or as required
Margarine for frying

Blend until really smooth.  I use a high speed blender but this is not necessary though I would recommend some sort of blender if you want to use squeezy bottles.  Colour if desired. Pour into squeezy bottles.  Heat frypan over low heat.  Grease with a small knob of margarine.  Draw outline of picture with squeezy bottle.  Fry  (I think 5-10 minutes) until well cooked.  Remove from heat and fill in the picture.  Return to heat and cook until just set and maybe a bubble or two appearing.  Flip and let cook on second side for longer until golden brown.

Banana sourdough pancakes variations

I have made pancakes with these ingredients lists using the above methods.

2 ripe bananas
1 1/2 cups over ripe sourdough starter
1/2 cup wholemeal plain flour
2 tablespoons canola oil
1 tablespoon  maple syrup
2 teaspoons baking powder
1/4 teaspoon of salt
1 tsp beetroot powder (for pink pancakes)

2 ripe bananas
1 cup thick sourdough starter
1/2 cup oats
2 tablespoons canola oil
1 tablespoon  maple syrup
2 tsp milk 
2 teaspoons baking powder
1/4 teaspoon of salt
1/2 tsp turmeric (for yellow hue)

On the Stereo:
Little Earthquakes: Tori Amos