Monday 30 July 2012

MLLA Chickpea pizza base

Of all the gluten free flours I have tried, chickpea flour (or besan or gram flour) has been the most reliable.  In fact, if I had to choose just one gf flour to stock, I think this would be it.  It has some qualities that I find unusual in a gf flour.  It doesn't take grainy.  It doesn't necessarily depend on other flours to balance it out.  Yes, it can smell a bit funny.  Yet it has been great all by itself in frittata, crackers, brownies.  Now it has proved itself a dream in a pizza crust.

As usual baking with Sylvia ended in a messy kitchen.  We had been trying on her clothes earlier in the day to check ones that didn't fit.  I found a party dress with a pink sash and a velvet top.  It was gorgeous but according to the label it should have been too small.  She wore it anyway and looked gorgeous.  It did get rather floury though in the pizza making.  Every time I put a handful of pizza on the table for handling the dough, Sylvia stuck her hand in it and swirled it everywhere!

The dough was slightly more fragile than my regular wheat pizza bases but it did bake up crispy on the outside and fluffy inside.  It tasted best hot.  We all enjoyed it and had no leftovers.  Sylvia ate some, though not heaps. (She seemed to enjoy playing with the raw dough more than the cooked pizza.)  I am not sure it would replace my fast track pizza dough on a regular basis but I am sure we will have it again.  Who doesn't love a pizza base that is quick, nutritious and tastes great. And it is gluten free and vegan!

I made a fairly standard pizza topping for sylvia with a tomato sauce (made by blending tomato paste and baked beans) and cheese.  I am so smitten with the tofu and cashew ricotta that I decided to use that in lieu of cheese on our pizza.  I used the tomato sauce, some olive, artichokes, cherry tomatoes and dollops of ricotta.  It was lovely with some baby spinach on top when cooked.  Both pizzas had lots of protein.

My expectations of home made GF pizza are low but this chickpea pizza was amazing.  However, the lovely chickpea flour can't take all the credit.  The dough also had ground psyllium husks.  An alternative to gums in GF baking.  I have had some in my pantry for too long.  Now that I have finally used them and found them great as a binder, I must use them more.  So I will finish with a list of other psyllium husk recipes that I want to use.

Recipes from the interwebs using psyllium husks:
I am sending this to My Legume Love Affair (#49), founded by Susan of the Well Seasoned Cook and hosted by Simone of Bricole this month. 

Chickpea pizza base
adapted from Cara's Cravings
makes 1 medium pizza and 1 small pizza

1 cup warm water
1 x 7g sachet of dried yeast
1 tsp brown sugar or other sweetener
1 and 1/2 cups chickpea flour (besan) and extra for kneading
4 tablespoons ground psyllium husks
1/2 teaspoon salt
polenta to sprinkle on pizza base

Stir together warm water, yeast and sugar in a mixing bowl.  Leave for about 10 minutes until the yeast blooms (ie it develops white, frothy patches).  Preheat oven to 250 C and generously sprinkle 1 medium and 1 small pizza trays.

Add remaining ingredients.  Tip out onto a board that has been floured with chickpea flour.  Knead for about 5 minutes.  Place dough back in the bowl and let rise for about 20 minutes.  (I let mine rise a bit longer).  It should be spongy but mine didn't double in size as regular wheat would.

Using well floured hands and a well floured board, roll out dough and transfer onto prepared pizza trays.  It wasn't too hard to transfer to the small tray but the dough was a bit fragile when transferring to a medium tray and had to be patched a wee bit.  Place your toppings on the pizza and bake for 15 minutes or until the crust is golden brown.  Best eaten hot. 

On the Stereo:
Way to Blue: Nick Drake

Saturday 28 July 2012

Celery and blue cheese soup and Open House Melbourne

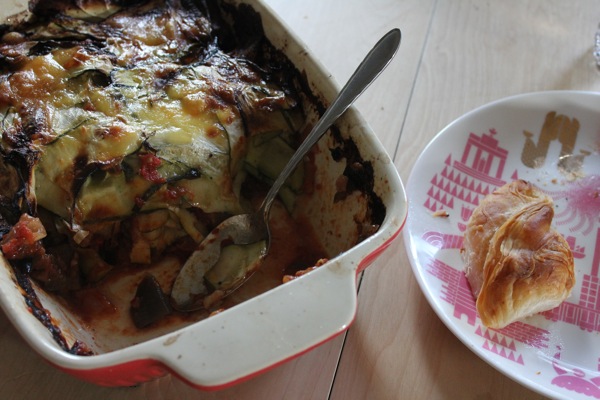
Today I have a celery and blue cheese soup to share with you.  It was good.  Very good.  But I don't have much to say about it, other than try it.  The blue cheese didn't overwhelm.  The amounts of celery and potato seemed flexible according to recipes I found on the web.  Even E was pleasantly surprised.  I ate mine with salad and E ate his with toast.  It would be quite festive if we celebrated Christmas in winter.  Nuff said.  What I really wanted to talk about was all the wonderful buildings we have seen today in Open House Melbourne.

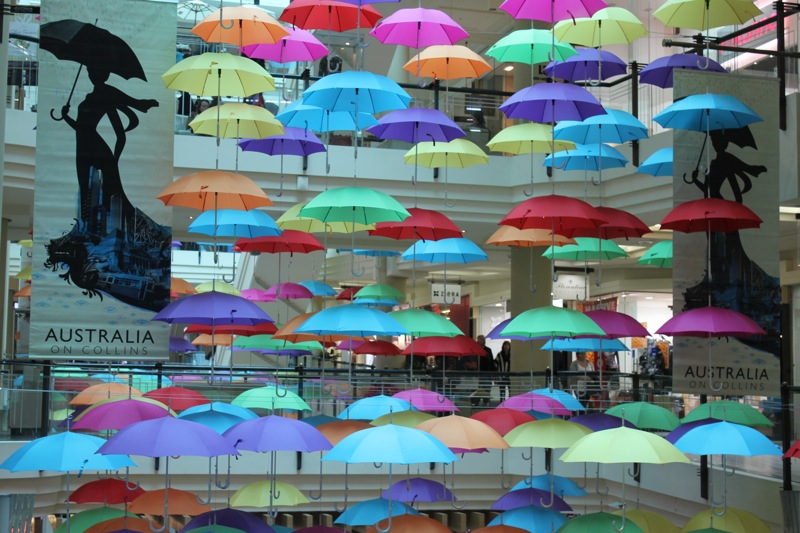
Open Doors Melbourne is when many of the buildings of interest around town are open to the public.  It required planning, sturdy walking shoes and a coat or brolly.  The weather wasn't kind to us today.  Nor was the public transport system (please stop moving tram stops).  Yet we managed to see four buildings with my dad before he headed off to watch the footy with my brother.

Our first building was Hamer Hall, which is one of Melbourne's major theatres and comprises part of the Arts Centre.  I remember doing a guided tour when it first opened many years ago so we just wandered aimlessly.  It has recently been refurbished.  It was too wet to photograph the outside.  I did take this picture of the new views towards Princess Bridge and St Paul's Cathedral.

Hamer Hall is full of memories for me.  So I really enjoyed the display in one of the dressing rooms of some of the people who had been there.  Above is a representation of 1970s New Zealand band Split Enz (some of whom morphed into Crowded House).  They did like their make-up.

In the same dressing room was also Ossie Ostrich.  I grew up watching Hey Hey It's Saturday with Daryl Somers and Ossie Ostrich.  So this loveable puppet's face just seems as familiar as a childhood friend.  I'm glad I know where he has got to.

Next was lunch at Grill'd and then the Queen Victoria Women's Centre.  I took the above photo to show the grand old building in its modern surroundings.  Once upon a time it was part of a huge old redbrick hospital.  I vaguely remember that it seemed a really ugly building in my early student days when I passed it on the tram.  Yet now I feel sad at the old building that was mostly pulled down, and a little glad that at least some has been saved and treasured.

Then we walked down to Myer to visit the Mural Hall on the 6th floor.  Myer department store is a Melbourne institution that is changed almost beyond recognition.  We used to have a saying when someone was bold, that they had "more front than Myer".  Now that the Lonsdale St side of the store is sold and demolished with only some of the facade remaining, I am not sure what the saying means any more.  I miss the Myer that I once knew and loved.

I am glad that I have seen the Mural Hall.  It is a grand art deco space.  The murals come from another time.  I thought, given the Olympic opening last night, that it would be topical to show you the Mural called "The Summer of Sports through the Centuries".  It is so different from today's representations of sport.  I prefer these quieter, more elegant images.

Many of the buildings we saw had lovely period features.  My favourite detail photo is the one of a light in the Mural Hall.  It is taken from directly beneath a light.  Isn't it beautiful?

Our last visit was to Tasma Terrace.  I take a personal interest in this building.  When I first moved into a share house in Melbourne, we found old newspapers in a cupboard dating back a decade or two.  One of the stories was about this grand old row of terrace houses being due for demolition.  I was so relieved to find it had been saved.

The building is now owned by the National Trust.  The front room has been restored to its former glory, as you can see above.  Today it was filled by a large dining table.  The last time we were here was as part of the audience in a wonderful mock history tour of Melbourne during the Commonwealth Games a few years back.  I was very glad to return and hope it wont be my last visit.

Open House Melbourne is on all weekend so maybe I will be back there tomorrow.  It really is a joy to wander aimlessly inside many of Melbourne's magnificent buildings.  (Read my Sunday experiences of Open House Melbourne.)

I am sending this soup to Deb of Kahaki Kitchen for her Souper Sundays event.

Previously on Green Gourmet Giraffe:
One year ago: Little Deer Tracks - Coburg chic
Two years ago: Tofu omelettes from China
Three years ago: Pear and Walnut Chutney
Four years ago: Chickpea cutlets and gluten strings
Five years ago: Hubert the Hog’s Head

Celery and blue cheese soup
Adapted from  Delia Online
Serves 4-6

1 tbsp olive oil
1 large onion, chopped
1 bunch of celery, trimmed and chopped
2 cloves garlic, chopped
3 medium potatoes, chopped
1/2 cup white wine
2 cups vegie stock (I used home made)
1/2 tsp french lavender salt (or regular salt), or to taste
250g silken tofu
handful parsley, roughly chopped, plus extra for garnish
120g blue cheese, crumbled
lots of freshly ground black pepper

Heat olive oil in a large saucepan or stockpot and fry onion, celery, potatoes and garlic (I added them as I chopped them) for about 10 minutes or until vegetables are softened.  Add white wine, stock, salt, and silken tofu.  Bring to the boil and simmer for about 30 minutes or until vegetables collapse at the sight of a fork.  Add parsley, blue cheese and black pepper.  Blend.  Check seasoning and adjust to taste.  Serve hot or warm, garnished with sprigs of parsley.

On the Stereo:
Moondawn: Klaus Schulze

Friday 27 July 2012

RRC Show us your Cookbooks

Each month Dom at Belleau Kitchen has his Random Recipe Challenge where he challenges bloggers to make a recipe by opening up a cookbook at random.  I haven't yet had the courage to join in but I couldn't resist taking him up on his July challenge to tell him about our cookbooks.  I felt it was only fair, given that I have been enjoying peeking at other people's cookbook collections.


To start with, at the top, is my main cookbook shelves.  I have three shelves - in our open plan living space - dedicated to foodie books.  They are mainly organised by size, with the oversized stacked horizontally.  My dad once categorised his books according to the Bliss System and I would love to organise these books with such attention to detail.  In reality, they are often in use and are returned wherever there is a space.

Many of the books in this section are cookbooks, mostly vegetarian or vegan, with a smattering of baking and chocolate books.  You can check out my list of cookbooks, which needs updating to include purchases and presents over the last few months. 

One section that I try and keep separate from the others is the above group of historic cookbooks - mostly older 20th century Australian ones - and some books reflecting on food and food history.  Every now and again I get all excited about food history and buy what I can.  I also use them for posts like my recent post about orange history.

In my dreams I would buy heaps of rare historic books - yellowing, dog eared, well thumbed - and keep them in an antique wooden cabinet with glass doors and a key to lock them away.  Maybe one day!

The three dedicated shelves are just not enough!  When we had our kitchen renovation last year, I had some shelves put up above the stove.  I keep a few of my smaller books here.  They will probably end up sticky from cooking vapours but it is just a little extra space for my cookbooks.

If you saw some of my piles of cookbooks and food magazines, you might understand why a little shelf space above the oven is valued.  Cookbooks pile up everywhere.  On the benches, on the kitchen table, on the desk, under the lamp and on our coffee table.  Above is one of the piles on the shelf under our coffee table.  It is buckling under the weight of my magazines and books.  Most of the magazines are Vegetarian Times.  I tell myself when I have time to sort through my backcopies I will subscribe again.  One day!

We also have piles of books on top of the coffee table.  These are ones that have found no room in our ever more cluttered home and have migrated here.  They are literally part of the furniture now, if you ask our cat, Zinc.  She thinks that Stephanie Alexander's Cook's Companion is a perfect place to sit and survey the loungeroom.

Lastly I will take you into my bedroom to see some of my recent reading.  I have been meaning to write about some of these books but where does the time go!  So I will briefly tell you about a few of the ones you can glimpse here.

  • Nigel Slater's Tender doesn't get the time in the kitchen it deserves because it keeps getting buried in my bedroom under good intentions to read it.  
  • I love the little yellow vegetarian cookbook from the 1940s that my sister Chris bought for me.    
  • Battenberg Britain, Nigel Slater's Eating for England and Cold Meat and How to Disguise It by Hunter Davies all make entertaining reading about British food history.  
  • You might glimpse Quick Fix Vegetarian by Robin Robertson that Susan of the Well Seasoned Cook kindly sent as a MLLA prize.  I have many plans but not yet cooked anything from it.
  • In addition, the bedroom piles also include a few novels I have been reading.   
I am very choosy about new cookbooks and yet more than I can use still make their way into my collection.  When I have time I intend to write a list of some of the recipes I want to try from my cookbooks, in a similar post to the one I did for the Cookbook Challenge last year.  I have also considered online systems to help using my cookbooks such as Eat Your Books.  Meanwhile I have many more good intentions than recipes that arise from the my cookbook collection.  But I can assure you they are used and loved!

Thursday 26 July 2012

The Beachcomber - brunch at the beach

It was a busy weekend of birthdays, balloons and the beach. We were blessed with winter sunshine, good food and good company.  And who isn't cheered up by a blue sky over the shoreline, even if it is too cold to swim in the sea.  My brother Andy had wisely chosen to have his birthday brunch at The Beachcomber Cafe in St Kilda.  It has huge windows out onto the beach and a good selection of food.

The cafe was spacious.  Our party of 11 adults and 6 kids easily found room inside, though all the seating outside was busy.  One can only imagine that it must be bursting at the seams in summer.  Likewise the menu is large with something for everyone.  Our table of omnivores, vegetarians, celiacs and fussy eaters were all pleased.  On offer was gluten free toast, a big breakfast with lots of variety and a decent children's menu.

I chose the home made baked beans with toast.  I enjoyed them.  They were on the sweet side but the beans were soft and the sauce was generous.  Sylvia and I shared a Berry smoothie.  It was chock-full of mixed berries, frozen yoghurt and tropical juice.  Unlike many smoothies I encounter in cafes, it was fruity rather than milky and was pleasingly thick.

Sylvia had the pancakes with maple syrup off the children's menu.  She gobbled them up before I had a chance to even have a taste.  The waitress didn't have a problem with leaving the cream off her pancakes order or with changes to the big brekkie when E ordered.  And when the kids got restless, we took them outside to play in the sand.  It was lots of fun with sandcastles, cartwheels and seashells.

Also on the weekend I visited my mum who made an amazing lunch.  I must get the recipe to the above zucchini and eggplant bake from Ottolenghi.  She served it with green salad, cheese pastries and bread.  For afters there were fluffly buttermilk scones and a delicious layer cake warm out of the oven, sandwiched together with raspberry jam.  Not a bad effort after flying home from Ireland 3 days earlier.  After lunch, we visited my sister, Susie, in her lovely new house. 

Less sunny but equally enjoyable was our visit to the Edinburgh Castle Hotel late in the afternoon.  E was playing with his ukelele group.  They seem to have lots of fun.  There were cowboy costumes, kazoos and jokes.  And lots of lively music that got us up and dancing.

I ordered chips for the three of us.  They were hot and crispy.  In fact, if we hadn't had a fridge full of leftovers I might have even stayed for dinner.  But there was pizza, tofu nut balls and my mum's baking.  We headed out into the cold night for a long wait for the tram.  Oh well, at least there were no problems with navigation and parking!


The Beachcomber Cafe
10-18 Jacka Boulevard (near St Kilda Pier)
St Kilda Victoria 3182
(03) 9593 8233
www.beachcombercafe.com.au

Tuesday 24 July 2012

WSC Chocolate thumbprints and a stew

A challenge from Choclette and inspiration from Kari led us into the supermarket on the way home one evening last week.  We were seeking blackcurrant jam for thumbprint biscuits (or cookies).  I had already been to the supermarket earlier that day but I was too busy child-wrangling to remember the thing I had gone to buy.  I had expected one of the fancier labels to make blackcurrant jam.  All I could find was homebrand and plain old Cottees.

We came home with a jar of Cottees blackcurrant jam to freshly shelled walnuts and some walnut babies that we had made earlier in the afternoon.  (I didn't have any beads like the template I was following so we used playdough which worked ok unless a wee thumb was pressed into it.)

It was late by the time we started baking.  Fortunately I had fed Sylvia as much dinner as possible.  The mixture was so good that I considered eating it instead of making my own dinner.  Sylvia loved it so much that she went and found a spoon.  I think she intended to eat her body weight in the mixture.  I had to put a stop to that.  Though I was tempted to do the same thing myself!  We told each other many times that it was sooooooooo delicious.

I love seeing where people get ideas.  Kari's recipe had evolved from two very different recipes.  I chose to make my biscuits a bit like the richer recipe she used by adding in some ground walnuts and chocolate.  I was also delighted to find an opportunity to use some walnut oil.  As Kari said, it was as good as brownies.  But more portable.  Think of a cross between a brownie and a jammy dodger.

The biscuits were also an ideal opportunity to create a blackcurrant recipe for We Should Cocoa.  Sylvia wanted apricot jam so I used apricot in half the bikkies and blackcurrant in the other half.  I used far less jam than Kari but I followed her lead in baking the biscuits, pressing a thumb (or in my case a half teaspoon measure because the biscuits were so hot), adding jam and returning to the oven for a few minutes.  The jam straight out of the oven seemed so liquid that I was sure it would never set.  Yet it did gel more once the biscuits cooled.  The only other time I have made thumbprint biscuits on my blog, I added the jam before baking, which seems more straightforward.  I wish I had the time and energy to experiment and tell you which way I recommend.

After tasting some mixture and one or two cooked biscuits (for research, of course) I really did need something savoury.  I intended to bake a Casserole of Lentils Rice and Sausage in the oven like Kalyn's but I ran out of puff and once it was cooked on the stovetop, I served it up.  My expectations were low.  E loved it and so did I.  I think it could do with more experiments but it was very good as it came.


Previously on Green Gourmet Giraffe:
One year ago: Pumpkin cake for Dolly's tea party
Two years ago: Lentil quinoa balls and fun links
Three years ago: Morning Rush Muffins
Four years ago: Vegetarian Cassoulet
Five years ago: Mushroom Yoghurt Pie with Spinach Crust

Chocolate walnut thumbprint biscuits

Adapted from Bite Sized Thoughts and Kitchen Daily
Makes about 24 biscuits

70g dark chocolate
1/3 cup walnut oil (or neutral oil)
1/4 cup milk (I used soy milk)
2/3 cup (scant) brown sugar
2 tbsp cocoa
1 tbsp dessicated coconut
1/2 cup walnuts
1/2 cup wholemeal plain flour
1/4 cup plain white flour
1 tsp baking powder
Jam (I think I used about 1/4 cup)

Preheat oven to 180 C and line two oven trays. Finely grind walnuts. Break chocolate into small chunks in a microwave proof mixing bowl and gently melt in the microwave. Mix in remaining ingredients, except jam. Try not to eat the bowlful before you get it in the oven (it is that good). Roll mixture into balls about the size of a walnut. *Make a dent in each with your thumb and drop in about 1/4 tsp jam (I found this enough but add more if desired). Bake for about 12 minutes or until cooked on the outside. Cool on the trays and store in an airtight container.

* I cooked mine for 10 minutes and then made a depression with a half tsp measure because the biscuits were hot and then added jam and returned to the oven for 2-4 minutes. However, as discussed above, I think I would like to try putting the jam in before baking.

Rice, sausage and lentil stew
Inspired by Kalyn's Kitchen
serves about 4-6

2-3 tsp olive oil
1 large onion, chopped
2 large carrots, grated
6 vegetarian sausages, chopped
350g passata
1/2 tsp wild garlic salt
1 clove garlic
2 cups cooked rice
400g tin lentils, rinsed and drained
shake of smoked paprika
(Note: I think sultanas might be interesting in here but didn't think of this til later)

Gently cook onion in olive oil over a large frypan until very soft and caramelised. While you are cooking onion, grate carrots and add to onions as they cook. Now add in chopped sausages and keep cooking (I did wonder about cooking these sausages first but didn't have time). When onions and carrots are well cooked, add in remaining ingredients. Check seasoning. Bring to the boil and simmer for about 10-15 minutes to warm through and thicken the sauce.

On the stereo:
Music to watch girls go by: Various Artists

Sunday 22 July 2012

WW Tofu nut balls and princesses

One thing leads to another.  Leftover rice led me to a favourite recipe for Tofu Nut Balls.  Buying craft stuff with Sylvia leads us to Spotlight where we bought fabric for blogging photos.  Making princesses and monsters out of old toilet paper rolls leads to ideas for decorating a birthday card.

Here are the princesses and monsters.  The monsters have jangly bells on pipecleaners through holes make with a hole punch.  I meant to make some crazy hair too but the pipecleaners took over.  Googly eyes are lots of fun.  I was impressed that Sylvia wanted trousers on her princess.  I cut out a crown top and tried a few ideas for hair on our princesses.

The hair idea transferred nicely to a princess birthday card.  It was a joint effort between Sylvia and me.  I was pleased to find a use for the ribbon that has been hanging around the house for ages.  Sylvia decided on one green eye and one pink eye.  I'm thinking of trying this card with fabrics rather than paper.

The birthday card was made while these tofu nut balls baked in the oven.  I needed something quick to get dinner underway and, with a tub of old rice, I found we had everything I needed for tofu nut balls.  It is a simple ingredient list and they are easy to make.  The Enchanted Broccoli Forest by Mollie Katzen was one of the first vegetarian cookbooks I owned.  These tofu nut balls were a magical discovery all those years ago.

I wonder if I would find them quite as amazing if I found the recipe today.  Probably not.  I have encountered many vegetarian burgers since then and they have quite a few similarities to nut roasts.  However, I still find them easy and delicious.  They are equally good as nibbles at a party or vegetarian meatballs with pasta.

Mollie suggests serving them with tomato sauce or mushroom tahini sauce.  I have tried both and prefer tomato sauce.  I made a basic one to serve these with on Friday night - olive oil, onions, garlic, a tin of tomatoes, salt, maple syrup and worcestershire sauce.  Simply yummy.  (I imagine a pumpkin sauce or a pesto sauce would be great too.)

It was a simple dinner with some steamed broccoli and brussels sprouts on the side.  That was all we needed between last week's baking and the weekend's social meals. 

One things leads to another.  A healthy meal leads to Ricki's Wellness Weekends and I have no doubt that visiting the Wellness Weekends page will lead to many interesting and delicious blog entries.  I am also sending the monsters and princesses to Red Ted's Art Blog, a recently discovered source of inspiration for craft.

Lastly, my concern about Shabby Blogs has lead me to take them off my blog design and replace the wallpaper with a new one - check out this post to see the progression of designs on my blog.

Previously on Green Gourmet Giraffe:
One year ago: MLLA Chickpea, potato and tomato stew
Two years ago: Syrup cake, shoes and chooks
Three years ago: SHF Apricot sponge – by any other name
Four years ago: Stouty Oatmeal Beer Bread
Five years ago: Sesame and Lemon Bread

Tofu nut balls
From The Enchanted Broccoli Forest by Mollie Katzen
serves about 4

3/4 cup cooked brown rice (or cook 1/2 cup dried brown rice)
225g firm tofu
2 tbsp tamari
1/2 cup ground almonds
1/2 cup wheatgerm
oil spray (or oil for frying)

Place 1/2 cup cooked rice and 110g of tofu with all the tamari in a food processor or blender and blend to make a smooth paste.  Mash up remaining tofu in a mixing bowl.  Add rice and tofu paste, almonds and wheatgerm.  Stir thoroughly until you have a stiff mixture.  Roll into balls the size of walnuts.  Spray with oil spray and and bake on oven tray at 180 C for about 30 minutes or until golden brown (mine took longer) or shallow fry until golden brown.

On the Stereo:
Unknown Deutschland: the Krautrock Archive, vol 2: Various Artists

Saturday 21 July 2012

For the Love of Pizza - good food and good fun

Tonight we went to For the Love of Pizza in Northcote for a birthday dinner for Sylvia's friend, Amelia.  The place was fairly plain but the menu was extensive, the pizzas thin and tasty, and the staff friendly.  As the children donned their sparkly party hats, they were each given a blob of pizza dough to play with on a handful of semolina.  Now this is the way to impress three year olds!

The menu offered a few vegetarian choices and lots of entertainment in the pizza names.  I honed in on the Pumpkin.  It appeared to be dominated by the slices of pumpkin when it arrived but in fact had a great balance of flavours.  As well as nicely cooked pumpkin, the toppings included olives, ricotta, tomato, mozzerella and maybe basil.  I loved that the base was crispy and the toppings weren't overwhelmed by cheese.

My pizza was so good that I didn't regret not ordering the hallouminati pizza or the potato one.  E loved his meatballs pizza.  Everyone enjoyed their pizzas.  Everyone but Sylvia, who had eaten a large piece of my mum's cake this afternoon and decided she didn't like her margherita (above).  I had a taste and it was very nice, but after the flavoursome Pumpkin pizza, I found the cheese overwhelming.  Urbanspoon has a few comments about how good the gluten free pizza bases are and I think I spied one vegan pizza too.  Something for everyone.

Amelia's mum, Kathryn, came well prepared.  In addition to party hats, wet wipes and party bags, she brought along a cute Miss Piggy cake complete with candles.  A small piece of delicious strawberry flavoured cake at the end of the meal was plenty of dessert.  Yet I was a bit sad that I hadn't the time to try the nutella calzone.  Maybe next time.

For the Love of Pizza
493 High St
Northcote, VIC 3070
03 9486 8886

Thursday 19 July 2012

Irish No Knead Bread

At the end of a hard day last week I bought myself some beer.  For baking bread of course.   Well I was passing the bottle shop because the car was at the mechanics.  It is the second time I have made this Irish No Knead bread.  I loved it both times.  I just wish so many of my photos of it hadn't disappeared into the ether.

You see, I take too many photos.  And I am not good at deleting photos.  A couple of years ago, I had iPhoto clogging up my computer and thought I moved all my photos onto an external hard drive.  They have gone.  Like snow on the water.  Fortunately I have kept most of the good photos but I thought I had the whole lot to play with.

Recently, I have had problems with my computer being too full of photos so I thought I might try and delete more as I went.  In my enthusiasm, I have deleted a lovely photo of this bread from the weekend.  Argh!  I really am not good at deleting photos.

The first time I tried this recipe I made lots of notes about it seeming all wrong because it was much stiffer than Jim Lahey's original no-knead bread.  I got the measurements wrong and then forgot about the timer.  In my defence, I also made lots of obscure notes about nappies, baking florentines, and a disagreement over a crochet rug.  Yet my misgivings were unfounded.  The bread was brilliant and every bit as burnt-looking at Jim Lahey's.  I wish I had a picture to show you.

When I made the bread last weekend, I didn't have buttermilk so I used a mixture of yoghurt and soy milk and I found the dough to be slow to rise.  I left it on the second rise for 6 hours rather than 2 hours because I took Sylvia for a bike ride and then we hopped on a tram to go to a bookshop and ended up coming home laden with craft stuff, material scraps, vegies and lots of good books (The Wombles, Milly Molly Mandy and The Jolly Postman).  I also substituted oats for some of the wholemeal flour.  The recipe was forgiving yet again and the bread was delicious. This is a loaf that is a little healthier and a little fancier than regular bread.  What's not to want to photograph!

I am sending this to Susan for her weekly YeastSpotting event.

Previously on Green Gourmet Giraffe:
One year ago: CC Vegetarian Moussaka
Two years ago: Fish and chips – reflections of a vegetarian
Three years ago: From Disaster to Parfait
Four years ago: Pumpkin, PC Stories and a Roast
Five years ago: Dench bread and Dukkah: simple pleasures

Irish No-Knead Bread
Adapted from Jim Lahey's My Bread: The Revolutionary No-Work, No-Knead Method

2 1/4 cup white bread flour
1/2 cup oats
1/4 cup wholemeal flour
1 tbsp wheatgerm
1 tsp salt
1/4 tsp dried yeast
3/4 cup stout
3/4 cup buttermilk (I used 1/2 cup yoghurt and 1/4 cup soy milk)
flour and wheatgerm, extra

Mix all ingredients, except extra flour and wheatgerm.  Knead or stir for about 30 seconds. 

Cover with clingwrap and leave for 12-18 hours.  It should be slightly bubbly and risen.

Using floured hands or scraper, tip dough onto a floured board and shape into a ball or loaf shape.  Scatter a tea towel flour or wheatgerm (or both - I used rather a lot as Sylvia helped with scattering and my last attempt at no knead bread still can be seen on the tea towel despite two washes so I was a little paranoid).  Place dough on the tea towel.  Scatter with more flour and/or wheatgerm and fold tea towel over the dough.

Leave dough to rise for 1-2 hours or until risen.  I let mine go a bit longer than this the first time but I let it rise for 6 hours on the weekend which I think may have been a bit too long.

Thirty minutes before the dough is ready, place a lidded baking dish (cast iron or stoneware) in the oven and heat to 230 C.  After 30 minutes, take baking dish out of the oven and tip the dough in.  Shake about a little if needed to even out dough in the dish.

Bake for 30 minutes with the lid on and then another 15-30 minutes without lid on or until bread is a deep brown.  Cool on a wire rack.


On the stereo:
Super Trouper – ABBA